Hey there everyone. As promised, I am going to open up my travel painting case and show you what I like to take along on painting seminars and such.
I actually have one case that is an old makeup case that my daughter was gonna toss out. Of course, knowing that her mom saved everything, she offered to me. I know a good deal when I see it and snagged that puppy right up!!!
Now, let's have a look inside. I will just list some of the stuff that I keep in it - far left is splattering tool and brushes, compass ruler, extra pens and pencils. Center, up the middle in the eyeshadow brush area - plastic spoon (just sounded like a good idea at the time), stylus, soap stone, exacto and couple detailing tools. Center open compartment - pliers, scissors, assorted tapes (painters and clear), round rubber thingy to put under my pallet to keep it from moving around, hand battery operated fan, pencil sharpener in a baggy to hold the trash part til I can get to the trash can, collapsible water basin, cotton swabs, dobbers, water bottle, alcohol wipes, sandpaper, tracing paper, carbon paper, pallet paper (the papers are all folded into quarters and put into one baggie, pallet knife, tissue and bandaids. Then, on the far right side is extra paper towels folded into quarters, and some of the hand/feet warmers from the store. Yes, all of that fit in this one little case. Pretty amazing isn't it!!! I have to be really careful packing it or it won't close. The little pink ribbons are glued in to help hold stuff in place when carry it around.
There is another item that I use a lot when painting too, this basket. I made the liner out of plastic canvas and made it to hold brushes down the center and two rows of paints on one side, and books on the other. If you decide to make one of these, I would suggest that you get one with a fixed handle. I used to carry a utensil organizer, but the handle moved back and forth and would mess up the tops of all the brushes. So, I knew that this one had to be fixed, un-movable.
Between these two items, I have all that I need when painting. All I have to carry separately is my canvas or whatever my surface is. Hope you have enjoyed this weeks post. Next week, I am going to show you my completed art/craft room. See ya later, Pam
Tinker Around
Welcome to my blog. It is full of basic projects and tutorials for things that I have done and feel like others out there would benefit from learning too. Be sure to take time to leave me a comment. Thanx, Pam
Wednesday, February 23, 2011
Thursday, February 17, 2011
Organization...Day Three
Wow!! What a week!! We put our 22 year old daughter on a plane to South Korea on Wednesday. She has a work Visa to teach English in Daejeon for a year or two. She is like an extension of my right arm and my painting buddy! I am so thankful for Skype and that we have already gotten to see and chat with Sarah!!!
Ok, you didn't come to hear about that. Sorry, I had said that we would talk about my paint storage case and what is in it, but we are going a different route. Canvas Storage and Flooring. Maybe I will be where I can get the case out and go through it next week. So... on with the canvas storage and what is going on in the art/craft room organization and redo. I am going to post step by step photos this week. Here is a picture of the canvas all hung up nice and pretty, it turned out just like I have envisioned in my head!! Love when that happens.
Now, here are the steps that I took. First, decide how many canvas you can put in one grouping and the door still open and close, or you could just put them in a closet on the wall or wherever. The thing is, you need to get a measuring tape out and see what length of belting, strapping or whatever materials you are using is going to be needed. I am using this purse handle webbing that is one inch wide and was purchased with a coupon from my local fabric store.
Then, I took and slathered the area where I was going to cut it with Fray Check or some sort of Fabric Glue and let it dry before you cut it. This will keep the ends from raveling later, you can see that mine still shows signs of raveling because I tugged on it so much to get the knots smaller.
I used the Hercules Hooks as my nails or hangers. I purchase these things at the store, and get a couple packs at a time. They are great and I have NEVER had anything to fall off the wall when using these.
Lastly, hang the straps up and slide in your canvas. Isn't that cool!!! And yes, I thought it up myself and am rather pleased with that fact! I am also thinking of hanging some shelves using the same technique, though I don't know yet. If you have questions about how these hooks work or anything, please feel free to post under comments.
Peel and stick tiles are not the best flooring around, but when you have carpet that is paint stained and rippling...well, I had to do something cheap for safety sake!! First, I cut the carpet with a cutting knife/blade and took a look underneath to make sure there were no major cracks in the flooring. IF you have large cracks, stop!! You will need to have your house professionally leveled before you do anything else. Mine was fine so I proceeded to take out the carpet, and it is heavy, so do it in sections if you are working alone like I was.
Be careful when you start pulling out those tack strips, they use strong pointy nails for a reason. Use a claw hammer and flathead screwdriver to get under the edges and get all the nails out of the concrete.
Then, take an old, really trashy towel and wipe down the concrete, get all the little pieces and dust off the floor. Tile won't stick to dust!!! Don't try to get all the tire tracks and stuff up, just get it dust free and flat. Meaning...if there are globs of ceiling and stuff stuck on the concrete you better get it up. No reason to go to all this trouble to have that tile ripple with a lump under it later.
Next, fill the little holes with joint compound. You can get it at the hardware store in a small tub. Be sure to get some sort of a putty knife to put it down with. I lost mine somewhere during the carpet removal and used a pallet knife to finish up. (I did find it in the kitchen sink later. lol) This is like icing a cake and filling the cracks. You can go back and lightly sand the filled areas later to smooth them out, I got mine flat enough the first time that I didn't bother.
I also decided to paint the walls and baseboards before laying the tiles. Might as well do it all while I was at it. The baseboards got painted to go with the door frame. I just felt that there was too much white and cream everywhere if I were to leave them unpainted. I took two different colors of Folk Art craft acrylics and a flat brush, dipped the brush into the two colors (one on each corner) and just slapped it on there. Really! I didn't do anything special except to keep the paint on the baseboards. I even let the paint get on the concrete. Seriously! It IS that easy. Here is a picture of before and after.
I hand wipe each section just before laying the tile on the concrete, yes, I just swipe it with my bare hand. Be sure that the concrete has dried completely and all the holes are dry too. Nothing like a tile popping up later cause you didn't take the time to do it properly. Also, be sure to purchase extra tiles and store in the closet for tiles that crack or get so dirty that they have to be replaced. I did that with my bathrooms over 10 years ago, and have never needed the tiles, but I have them just in case. The patterns that I used in those bathrooms have been discontinued now. Better safe than sorry.
Most folks say to start in the middle of the room and work your way out. I start at the doorway. The reason for this is that no room is square, you are going to have to cut pieces for adding at the side walls and stuff, no way around that. But, when I walk into a room, the highest traffic area...I want to start with a full sized tile and not some little piece that has been set in at the end that might pop out.
Here is a picture of the floor before and the tile after. I like the tile. Looks like a slate or marble, and it is .99 a square peel and stick. Go figure!!!
I really hope that this information will help someone decide to tackle that flooring, it really isn't that hard. And I think the payoff is great, my students and I love it!!!
That is it for this week. Hope to have the room almost finished by next week and then we will finish this Organizational Section of the blog up and go on to something else. Hope you are all having a great week and getting some organizing of your own done. Please take the time to leave me some comments, I look forward to reading feedback from my readers. - Pam
Ok, you didn't come to hear about that. Sorry, I had said that we would talk about my paint storage case and what is in it, but we are going a different route. Canvas Storage and Flooring. Maybe I will be where I can get the case out and go through it next week. So... on with the canvas storage and what is going on in the art/craft room organization and redo. I am going to post step by step photos this week. Here is a picture of the canvas all hung up nice and pretty, it turned out just like I have envisioned in my head!! Love when that happens.
Now, here are the steps that I took. First, decide how many canvas you can put in one grouping and the door still open and close, or you could just put them in a closet on the wall or wherever. The thing is, you need to get a measuring tape out and see what length of belting, strapping or whatever materials you are using is going to be needed. I am using this purse handle webbing that is one inch wide and was purchased with a coupon from my local fabric store.
Then, I took and slathered the area where I was going to cut it with Fray Check or some sort of Fabric Glue and let it dry before you cut it. This will keep the ends from raveling later, you can see that mine still shows signs of raveling because I tugged on it so much to get the knots smaller.
I used the Hercules Hooks as my nails or hangers. I purchase these things at the store, and get a couple packs at a time. They are great and I have NEVER had anything to fall off the wall when using these.
Lastly, hang the straps up and slide in your canvas. Isn't that cool!!! And yes, I thought it up myself and am rather pleased with that fact! I am also thinking of hanging some shelves using the same technique, though I don't know yet. If you have questions about how these hooks work or anything, please feel free to post under comments.
Peel and stick tiles are not the best flooring around, but when you have carpet that is paint stained and rippling...well, I had to do something cheap for safety sake!! First, I cut the carpet with a cutting knife/blade and took a look underneath to make sure there were no major cracks in the flooring. IF you have large cracks, stop!! You will need to have your house professionally leveled before you do anything else. Mine was fine so I proceeded to take out the carpet, and it is heavy, so do it in sections if you are working alone like I was.
Be careful when you start pulling out those tack strips, they use strong pointy nails for a reason. Use a claw hammer and flathead screwdriver to get under the edges and get all the nails out of the concrete.
Then, take an old, really trashy towel and wipe down the concrete, get all the little pieces and dust off the floor. Tile won't stick to dust!!! Don't try to get all the tire tracks and stuff up, just get it dust free and flat. Meaning...if there are globs of ceiling and stuff stuck on the concrete you better get it up. No reason to go to all this trouble to have that tile ripple with a lump under it later.
Next, fill the little holes with joint compound. You can get it at the hardware store in a small tub. Be sure to get some sort of a putty knife to put it down with. I lost mine somewhere during the carpet removal and used a pallet knife to finish up. (I did find it in the kitchen sink later. lol) This is like icing a cake and filling the cracks. You can go back and lightly sand the filled areas later to smooth them out, I got mine flat enough the first time that I didn't bother.
I also decided to paint the walls and baseboards before laying the tiles. Might as well do it all while I was at it. The baseboards got painted to go with the door frame. I just felt that there was too much white and cream everywhere if I were to leave them unpainted. I took two different colors of Folk Art craft acrylics and a flat brush, dipped the brush into the two colors (one on each corner) and just slapped it on there. Really! I didn't do anything special except to keep the paint on the baseboards. I even let the paint get on the concrete. Seriously! It IS that easy. Here is a picture of before and after.
I hand wipe each section just before laying the tile on the concrete, yes, I just swipe it with my bare hand. Be sure that the concrete has dried completely and all the holes are dry too. Nothing like a tile popping up later cause you didn't take the time to do it properly. Also, be sure to purchase extra tiles and store in the closet for tiles that crack or get so dirty that they have to be replaced. I did that with my bathrooms over 10 years ago, and have never needed the tiles, but I have them just in case. The patterns that I used in those bathrooms have been discontinued now. Better safe than sorry.
Most folks say to start in the middle of the room and work your way out. I start at the doorway. The reason for this is that no room is square, you are going to have to cut pieces for adding at the side walls and stuff, no way around that. But, when I walk into a room, the highest traffic area...I want to start with a full sized tile and not some little piece that has been set in at the end that might pop out.
Here is a picture of the floor before and the tile after. I like the tile. Looks like a slate or marble, and it is .99 a square peel and stick. Go figure!!!
I really hope that this information will help someone decide to tackle that flooring, it really isn't that hard. And I think the payoff is great, my students and I love it!!!
That is it for this week. Hope to have the room almost finished by next week and then we will finish this Organizational Section of the blog up and go on to something else. Hope you are all having a great week and getting some organizing of your own done. Please take the time to leave me some comments, I look forward to reading feedback from my readers. - Pam
Wednesday, February 9, 2011
Organization...Day Two
Not sure that we can ever get fully organized, but I sure am trying to get the one room finished up!!! So, last week I said that I would touch on that one space that everyone has and almost no one utilizes. Do you know what it is?? There is about a two foot by one foot space above all door, especially closets, that is just there. I have done several things over the years to take advantage of this unused space. I do apologize, but there won't a lot of pictures this week. The craft room is a wreck and not worthy of any photos right now! Here are a few ideas...
See ya in a week, and hope to have more pictures then. I still have to finish rearranging the furniture after I get on a fresh coat of light tan paint (it is bright purple right now) and get all the nasty carpet pulled up. Just wanted to show you the current color of the Art/Craft Room.
My daughter leaves next Wednesday for So.Korea to teach English for a year, so things are very busy here. Next week I will share with you what is in my travel painting case and how I carry my paints and brushes to Seminars. See ya in a week, and I promise to be more together then!
- In a craft room or your bedroom, put a couple nails up there and hang small gift bags full of tags, cards, scissors, bows and tape. When you go to wrap a gift, everything except the wrapping is right there! Be sure to use a gift bag with the hard handles, not the limp ones that you can't get up and down without a chair or ladder.
- How about a shelf up there for all your extras for the bathroom...store extra soap (makes the closet smell nice!), toilet paper, shaving cream, deodorants,...
- In the kids rooms, how about a shelf for hand me down shoes to grow in to.
- Guest room, what about an extra set of sheets? It is not like the guest are staying forever, so you don't really care what is up there as long as you remember it is there. You could put extra stuff that they might need while staying with you, but make sure it doesn't get outdated.
- Out in the garage, paper towels that are sealed in plastic, paper plates, napkins, party or hot cups,...
See ya in a week, and hope to have more pictures then. I still have to finish rearranging the furniture after I get on a fresh coat of light tan paint (it is bright purple right now) and get all the nasty carpet pulled up. Just wanted to show you the current color of the Art/Craft Room.
My daughter leaves next Wednesday for So.Korea to teach English for a year, so things are very busy here. Next week I will share with you what is in my travel painting case and how I carry my paints and brushes to Seminars. See ya in a week, and I promise to be more together then!
Tuesday, February 1, 2011
Organization...Day One
Well, looks like I am gonna be posting early this week. It is snowing here in Central Texas and if I have to be shut in and am on my computer...I am sure of you are too. So...here we go!!!
We are going to be talking about organizing your art/craft room on and off for the next few weeks, as I am redoing mine! It is clean enough and somewhat organized now, but I know it can be better. My room is a 10'x13' bedroom that is located in the back of the house. The walls are purple, the carpet is a paint spotted dirty cream color, and the walls are lined with bookcases. See, it looks manageable.
But, the closet is a mess. When a closet looks this bad, it doesn't get used, everything stays buried and you have to dig or purchase new stuff. So, in the next few weeks, as the room gets cleaned and gone through, so of the stuff in the closet will come out. I am sure if you have a closet like this, there are things in there that need to be trashed or given to your crafty friends. I know my students are looking forward to our classes for the next month or so! lol (oh, there, see the purple wall!)
Let's look at one of my boxes of ribbon. This is what it looked like on the shelf, there were two boxes full. Inside, it was in rows and had a couple extras thrown on top. By the way, watch your local craft stores, these photo storage boxes go on sale all the time!! In fact, I just picked up four more this week for just over $2 each. You will see in future posts how and where I have used them in this room. Pretty and easily stacked.
It has all been wrapped and filed and now there is enough room for BOTH boxes of ribbon in the one box. You would be surprised how much room those spools take up...anyone got a craft project for all these empty spools?? What to do with them for now?? Easy, thread them all together and hang them from the ceiling in the garage.
We are going to be talking about organizing your art/craft room on and off for the next few weeks, as I am redoing mine! It is clean enough and somewhat organized now, but I know it can be better. My room is a 10'x13' bedroom that is located in the back of the house. The walls are purple, the carpet is a paint spotted dirty cream color, and the walls are lined with bookcases. See, it looks manageable.
But, the closet is a mess. When a closet looks this bad, it doesn't get used, everything stays buried and you have to dig or purchase new stuff. So, in the next few weeks, as the room gets cleaned and gone through, so of the stuff in the closet will come out. I am sure if you have a closet like this, there are things in there that need to be trashed or given to your crafty friends. I know my students are looking forward to our classes for the next month or so! lol (oh, there, see the purple wall!)
Let's look at one of my boxes of ribbon. This is what it looked like on the shelf, there were two boxes full. Inside, it was in rows and had a couple extras thrown on top. By the way, watch your local craft stores, these photo storage boxes go on sale all the time!! In fact, I just picked up four more this week for just over $2 each. You will see in future posts how and where I have used them in this room. Pretty and easily stacked.
It has all been wrapped and filed and now there is enough room for BOTH boxes of ribbon in the one box. You would be surprised how much room those spools take up...anyone got a craft project for all these empty spools?? What to do with them for now?? Easy, thread them all together and hang them from the ceiling in the garage.
Now, on to the process and then I will reveal the final project. Take and unroll the entire spool, start rolling it around the two of the inserts that come in the photo boxes. You might have to cut down those pieces of cardboard depending on how much ribbon there is. Here is a photo of where the ribbons are so long that they wrap around so many times that the ribbon roll is too tall for the box now. See how it sticks up above the edge of the box? See the second photo, I cut down the cardboard inserts and re-wrapped the ribbons.
You ready for this? Let's go back and take a look at the before photo and then the after will be right below that one. I love my new ribbon storage, and I have tried dowel rods and lots of other things. Soooo....what do you think???
Isn't that AWESOME!!!! Well, one of many boxes down, and now I even have an extra box to put more stuff into later!!! Yippee!!!
Now, let me show you how I organized all my little Sizzix and Cricut cut out shapes. This is really easy and it uses up a LOT of those little scraps of paper. Don't have one of those machines that cut out the shapes that you can use in altered art or scrapbooking?? There are folks that sell them on ebay, yes, you can order pre-cut shapes and even tell them what color you want them in. Do you have a friend that has a lot of punches that you like? Borrow them for a couple days and spend an evening in front of the tv punching a few and slip them into snack bags until you get your organization container, and then just transfer them over. I have even used a muffin tin to organize while I am between projects. Ok, here they are.
Then, I got another one of these tool and hardware organizers and did the entire alphabet. Be sure to keep the outside on the alphabet too, never know when you might want those pieces. Oh, I just used a black permanent marker to draw the letter on the outside, and it looks like the actual letter shape (font). You could even tape them to the inside and let them show through.
Wow!! I feel like I got a lot done. Eventually, you are going to see the new paint, shelving, and floor. This is going to have to do for now.
What am I going to do next week?? To be honest with you, I am not quite sure yet. I have so many ideas flowing in my brain, and so many projects in the works. I do know that we all have one little area of wasted space in our homes, and so I will post a small section on that next week along with my regular post.
Why don't you post some questions along with your comments and let me know what kinds of things you would like to read about. You never know, I might pick your question to write the next blog about!!! See ya in a week, Pam
Wednesday, January 26, 2011
Thrift Store Hymnal turned Cookbook
If you were with us last week, then you remember that I was going to show you my Cook Book.
Ok, here we go. This is a picture of my $2 hymnal turned cookbook from one of the many flee market/thrift stores that I visit each year.
I will mainly be showing a lot of pictures, I don't think you need too many instructions. You will need to figure out what tabs you want for your categories. My thickest part of the book will be for my desserts, that is what I enjoy baking the most. As you can see, I still need to do the labeling part. Also, the book will get fat if you pile in too many really thick embellishments without allowing extra pockets for the depth. We will talk about sinking them down into the pages in the next paragraph.
There are a few places where the 3D stickers or embellishments are really thick. I simply figured out how many pages it would take to get the depth and cut out a square that the embellishment could sink into. It is kinda like one of those books that has a hidden compartment inside, except that we went ahead and filled that spot.
You could also add pictures of what the dish is supposed to look like, or a picture of who you got the recipe from. Be creative and have fun with it. Be sure the title page is altered to reflect who it belongs to or will passed down to.
I keep mine out on the kitchen counter. It is a great conversation piece to have around.
Here are a few more pictures. Be sure to start shopping for food and baking stickers right away if you are going to make something like this for the kitchen. Sales are the best time to purchase and you can get more and stash them away for when you need them. I now have plenty!!! lol.
You could also use an old hymnal for a scrapbook, this would be a great gift for your music minister from the choir. I also tear out pages and paint on them and then sell them at shows, folks can put them in a floating frame that shows the frayed edges of time worn favorites. I would not suggest you tear up a hymnal in good shape, be sure to use one of the older ones that is already falling apart, they frame up nicely. Lots of churches are getting away from the old hymnals and you can find them fairly easy.
So, get out there and start creating! Be sure and add yourself as a follower. Next week we will take a look at some organizational tips, as I am really doing some deep cleaning in my art/craft room. Have a great week and I will see ya later, Pam
Ok, here we go. This is a picture of my $2 hymnal turned cookbook from one of the many flee market/thrift stores that I visit each year.
I will mainly be showing a lot of pictures, I don't think you need too many instructions. You will need to figure out what tabs you want for your categories. My thickest part of the book will be for my desserts, that is what I enjoy baking the most. As you can see, I still need to do the labeling part. Also, the book will get fat if you pile in too many really thick embellishments without allowing extra pockets for the depth. We will talk about sinking them down into the pages in the next paragraph.
There are a few places where the 3D stickers or embellishments are really thick. I simply figured out how many pages it would take to get the depth and cut out a square that the embellishment could sink into. It is kinda like one of those books that has a hidden compartment inside, except that we went ahead and filled that spot.
You could also add pictures of what the dish is supposed to look like, or a picture of who you got the recipe from. Be creative and have fun with it. Be sure the title page is altered to reflect who it belongs to or will passed down to.
I keep mine out on the kitchen counter. It is a great conversation piece to have around.
Here are a few more pictures. Be sure to start shopping for food and baking stickers right away if you are going to make something like this for the kitchen. Sales are the best time to purchase and you can get more and stash them away for when you need them. I now have plenty!!! lol.
You could also use an old hymnal for a scrapbook, this would be a great gift for your music minister from the choir. I also tear out pages and paint on them and then sell them at shows, folks can put them in a floating frame that shows the frayed edges of time worn favorites. I would not suggest you tear up a hymnal in good shape, be sure to use one of the older ones that is already falling apart, they frame up nicely. Lots of churches are getting away from the old hymnals and you can find them fairly easy.
So, get out there and start creating! Be sure and add yourself as a follower. Next week we will take a look at some organizational tips, as I am really doing some deep cleaning in my art/craft room. Have a great week and I will see ya later, Pam
Labels:
3D embellishments,
choir,
gifts,
hymnal,
music,
recipies,
scrapbooking
Thursday, January 20, 2011
Faux Finishes
Today's post will be all about taking shortcuts in our painting. Why spend hours making layer upon layer of paint when you could just do a faux finish in a whole lot less time and money? So, there are gonna be lots of pictures, and for each finish I will just list the tools and the paint colors that I used. The paints for these finishes are by Folk Art, that brand is the thickest of all the brand of crafting paints and therefore goes much further. All these are my practice boards so to speak, and are done on canvas sheets. I keep them for reference to show clients for backgrounds. Here we go!!!
Some rules that apply to these finishes...Completely drying something means that it can't be cool to the touch, because that means that it is still wet down under the top skin of paint. Walk away, let it dry! When you go on to a second step in a process, work fairly quickly as you don't want it to start drying while you are still trying to work with the paints. When working with sponges, be sure to wet it first and then wring it out real well, maybe even giving it a good squeeze with a cloth towel. Try to pick up liquid off a counter with a dry sponge...now try again with a sponge that has been wet and then wrung out. Amazing how much better and more efficient a dampened sponge works!
First. Woodgrain.
Basecoat with Butter Pecan, and let it dry completely. Next is a mix of two parts of glazing medium (from the craft store is fine) with one part of Burnt Sienna. Paint over the entire surface with the mix. Use your woodgraining tool (can get one at the hardware store or online) and pull through the paint while slowly rocking it to obtain the look you want. Because this mix had the glazing medium in it, you have some time to work with it. IF you don't like your first attempt, just repaint it with the paint that is already on the surface and try again. Let your rows overlap just slightly. Let it dry.
Second. Kinda looks like faux leather, depending on what colors you use.
Basecoat with Yellow Ochre, and let it dry completely. Make a mix of glazing medium and Burnt Sienna, equal parts of both. Work quickly and paint over the surface, lay a plastic shopping bag (writing on the INSIDE!) down over the top. Squish it around, leaving wrinkles all over. Peel it off and there you go. Don't like it? Just redo it real quick. Let it dry.
Third. Damp Sponge Background.
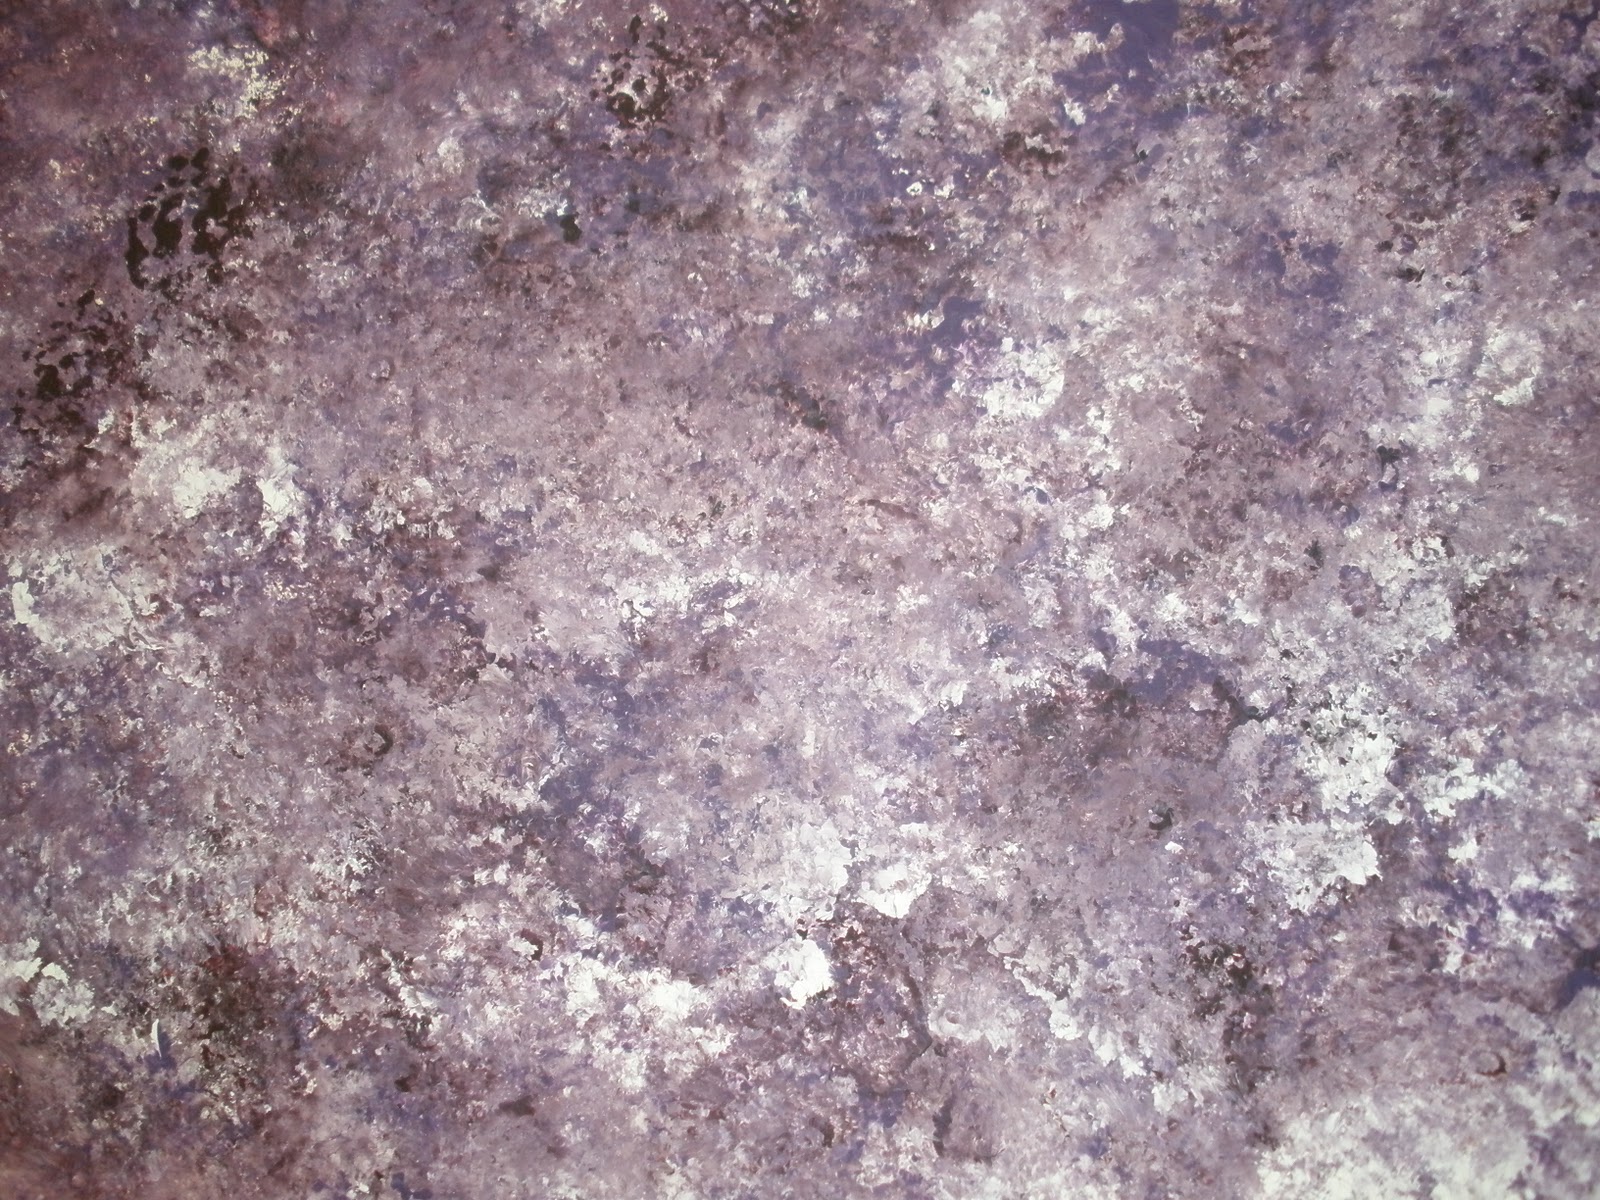
Here is where you use one of those sea sponges with all the holes in it, be sure to dampen and wring out. On a throw away recycled lid, put out Burnt Carmine, Violet Pansy, and Wicker White. Pick up some of each color and apply all over and repeat until your surface is covered. IF you need more open time to work, add just a bit of glazing medium with each color before you start. Rotate the sponge as you are pressing it down so that you don't get all the holes in the same places all the time. I have used the technique quite a bit when doing memory boxes for area hospitals. You can make a really soft pastel background to paint little baby things on.
Fourth. Damp Sponge Marble.
This is done like above as far as using a sponge, but it looks more like a marble due to the colors used. Basecoat in Burnt Umber, and let it dry. Now use water and thin the paint down a bit, it isn't going to be quite one to one. You don't want your paint runny, but you want it thinner than it comes out of the bottle. Colors that I used are- Burnt Sienna, Raw Sienna, Butter Pecan, Metallic Inca Gold, and Burnt Umber. Use your Sea Sponge and work while it is wet with all the different colors til you get the look you want.
Fifth. Denim.
Basecoat in Navy Blue, and let it dry. Second layer is a mix of glazing medium and a touch of true blue. Put this mix on very quickly with one of those inexpensive foam brushes and then with a VERY light touch drag a dry wallpaper brush through it to leave streaks. You can come back in and add any orangy colored stitch lines you want to after it is totally dry. You can also float a line of the color next to the stitching to make it look more like a raised seam.
Sixth. Linen.
Basecoat with Butter Pecan, and let it dry. Mix of 1/2 glaze medium and a little French Vanilla and coat the canvas. Quickly while it is wet, drag the dry wallpaper brush across it to leave fine lines. Let it dry. Repeat the mix and drag process again going the opposite direction. Let it dry. Nice background for lettering signs.
Seventh. Crosshatching.
You are going to use a 3/4" flat brush for this one. Wet the brush and dry it on a paper towel. Put Teal and Extender all around the outside using small "x" motion with your brush. Inside that comes the same technique with Cayman Blue and Extender, be sure to blend in with the first area. The last color is Wicker White and Extender in the center, blending with the colors used before. Can't tell you have many times I have used this for a background on many a surface!!! You can use any two or three shades and just go from dark to light, blending in little crosshatching "x" strokes as you go. Because of the extender, you can play with this for a while, but don't drag out the process. Love, Love, Love this technique!!!
Eighth. Diagonal.
Is done with a 3/4" flat brush and worked one color right after the other while it is still wet. You do one color and then do the next one and blend to create a color in between. Colors used are- Burnt Umber, Raw Sienna, Terra Cotta, and Linen. Keep using the same dirty brush through the entire process and don't overwork it. Let it dry. I have done quite a few angels on this background after changing the colors to various shades of blues and white.
Ninth. Crackle.
Really like putting a crackle on the background before doing something that is gonna be shabby-girly, antique or country. Basecoated with Bayberry, and let dry. This is really quite simple and I used the kit put out by Plaid called Crackle Coat Kit. Do the Undercoat in ALL ONE direction. Let it dry for about 30 minutes or until it is just tacky to the touch, no wet puddles! Then, going in ONE direction I put on a coat of Linen. DO NOT RESTROKE you work, it will start pulling up and moving around on you and you will end up with a mess. Trust me on this one. The less strokes, the better the results. Now, sit back and watch it crackle, too cool!
I encourage you to just get some old scraps of canvas or wood and try these out. Change up the colors and see what different effects you can get. Always remember, it is only paint. You can almost always sand it all off and start over!!! Enjoy these techniques and see how you can use them to change up your furniture, walls and decorative painting surfaces. Be sure a let me know what you think, leave me a comment. Are you using one of these techniques to revamp something?? I would love to hear about it!!
Be sure and check back in with me next week when I tell you what I use my Flee Market Hymnal for. Happy painting and go do something creative. - Pam
Some rules that apply to these finishes...Completely drying something means that it can't be cool to the touch, because that means that it is still wet down under the top skin of paint. Walk away, let it dry! When you go on to a second step in a process, work fairly quickly as you don't want it to start drying while you are still trying to work with the paints. When working with sponges, be sure to wet it first and then wring it out real well, maybe even giving it a good squeeze with a cloth towel. Try to pick up liquid off a counter with a dry sponge...now try again with a sponge that has been wet and then wrung out. Amazing how much better and more efficient a dampened sponge works!
First. Woodgrain.
Basecoat with Butter Pecan, and let it dry completely. Next is a mix of two parts of glazing medium (from the craft store is fine) with one part of Burnt Sienna. Paint over the entire surface with the mix. Use your woodgraining tool (can get one at the hardware store or online) and pull through the paint while slowly rocking it to obtain the look you want. Because this mix had the glazing medium in it, you have some time to work with it. IF you don't like your first attempt, just repaint it with the paint that is already on the surface and try again. Let your rows overlap just slightly. Let it dry.
Second. Kinda looks like faux leather, depending on what colors you use.
Basecoat with Yellow Ochre, and let it dry completely. Make a mix of glazing medium and Burnt Sienna, equal parts of both. Work quickly and paint over the surface, lay a plastic shopping bag (writing on the INSIDE!) down over the top. Squish it around, leaving wrinkles all over. Peel it off and there you go. Don't like it? Just redo it real quick. Let it dry.
Third. Damp Sponge Background.
Here is where you use one of those sea sponges with all the holes in it, be sure to dampen and wring out. On a throw away recycled lid, put out Burnt Carmine, Violet Pansy, and Wicker White. Pick up some of each color and apply all over and repeat until your surface is covered. IF you need more open time to work, add just a bit of glazing medium with each color before you start. Rotate the sponge as you are pressing it down so that you don't get all the holes in the same places all the time. I have used the technique quite a bit when doing memory boxes for area hospitals. You can make a really soft pastel background to paint little baby things on.
Fourth. Damp Sponge Marble.
This is done like above as far as using a sponge, but it looks more like a marble due to the colors used. Basecoat in Burnt Umber, and let it dry. Now use water and thin the paint down a bit, it isn't going to be quite one to one. You don't want your paint runny, but you want it thinner than it comes out of the bottle. Colors that I used are- Burnt Sienna, Raw Sienna, Butter Pecan, Metallic Inca Gold, and Burnt Umber. Use your Sea Sponge and work while it is wet with all the different colors til you get the look you want.
Fifth. Denim.
Basecoat in Navy Blue, and let it dry. Second layer is a mix of glazing medium and a touch of true blue. Put this mix on very quickly with one of those inexpensive foam brushes and then with a VERY light touch drag a dry wallpaper brush through it to leave streaks. You can come back in and add any orangy colored stitch lines you want to after it is totally dry. You can also float a line of the color next to the stitching to make it look more like a raised seam.
Sixth. Linen.
Basecoat with Butter Pecan, and let it dry. Mix of 1/2 glaze medium and a little French Vanilla and coat the canvas. Quickly while it is wet, drag the dry wallpaper brush across it to leave fine lines. Let it dry. Repeat the mix and drag process again going the opposite direction. Let it dry. Nice background for lettering signs.
Seventh. Crosshatching.
You are going to use a 3/4" flat brush for this one. Wet the brush and dry it on a paper towel. Put Teal and Extender all around the outside using small "x" motion with your brush. Inside that comes the same technique with Cayman Blue and Extender, be sure to blend in with the first area. The last color is Wicker White and Extender in the center, blending with the colors used before. Can't tell you have many times I have used this for a background on many a surface!!! You can use any two or three shades and just go from dark to light, blending in little crosshatching "x" strokes as you go. Because of the extender, you can play with this for a while, but don't drag out the process. Love, Love, Love this technique!!!
Eighth. Diagonal.
Is done with a 3/4" flat brush and worked one color right after the other while it is still wet. You do one color and then do the next one and blend to create a color in between. Colors used are- Burnt Umber, Raw Sienna, Terra Cotta, and Linen. Keep using the same dirty brush through the entire process and don't overwork it. Let it dry. I have done quite a few angels on this background after changing the colors to various shades of blues and white.
Ninth. Crackle.
Really like putting a crackle on the background before doing something that is gonna be shabby-girly, antique or country. Basecoated with Bayberry, and let dry. This is really quite simple and I used the kit put out by Plaid called Crackle Coat Kit. Do the Undercoat in ALL ONE direction. Let it dry for about 30 minutes or until it is just tacky to the touch, no wet puddles! Then, going in ONE direction I put on a coat of Linen. DO NOT RESTROKE you work, it will start pulling up and moving around on you and you will end up with a mess. Trust me on this one. The less strokes, the better the results. Now, sit back and watch it crackle, too cool!
I encourage you to just get some old scraps of canvas or wood and try these out. Change up the colors and see what different effects you can get. Always remember, it is only paint. You can almost always sand it all off and start over!!! Enjoy these techniques and see how you can use them to change up your furniture, walls and decorative painting surfaces. Be sure a let me know what you think, leave me a comment. Are you using one of these techniques to revamp something?? I would love to hear about it!!
Be sure and check back in with me next week when I tell you what I use my Flee Market Hymnal for. Happy painting and go do something creative. - Pam
Subscribe to:
Posts (Atom)