Tinker Around

Welcome to my blog. It is full of basic projects and tutorials for things that I have done and feel like others out there would benefit from learning too. Be sure to take time to leave me a comment. Thanx, Pam

Monday, January 7, 2013

Cake Balls for the Wedding

I told you that it was gonna be a while before I could get back here.  I trust that you all had a blessed CHRISTmas and have headed into the New Year running at full speed.  I know that several in our family has been hit with the crud, but for the most part we are ok now.

Cake Balls...When my son and his fiance asked if I would be willing to make cake balls for their upcoming wedding, I said "yes".  It is a ton of work and we had dozens left over, but it was all so worth it!  My kids don't ask for much, so I like to do what I can when they do.  Now though, I digress...back to cake balls.

There are lots of recipes for these online, but I am going to do a lot of pictures.  You should know by now that I am a visual person, and so that is how I teach too.  Let's get started...


Let's talk about cake and icing flavors.  I put white cake with white frosting, chocolate with chocolate, lemon with lemon, strawberry with strawberry, German chocolate cake mix with the coconut frosting,...you get the idea.


I mix it just like the box mix says, pop it into the oven, and set the timer.  Take this time to clean up the kitchen or toss in a load of laundry.  Multitasking will allow you to get so much more accomplished.  I don't know about you, but life is short and I have lots to do... or that I want to do anyway!  lol


There really isn't anything difficult about this next part.  Take the cake out and start scooping it into something that can take the heat and be put in the refrigerator.  Yes, start tearing up that cake as soon as you take it out of the oven!  Put it all in the bowl and just break it all up.  


This is where you are going to have to judge it for yourself as to how much frosting to put in.  Some days it seems to need more, and there are other days that it just seems different...maybe the weather outside and humidity has something to do with it?  I really don't know.  I do know that it takes between 3/4 to a full container of the frosting per cake mix.  I used full cans this time and it worked out fine.  Start mixing it...


Keep mixing...


There ya go, it is starting to look like cookie dough.  Now, cover it and put it into the refrigerator to chill.  Because I was doing these for a wedding and had about 500 cake balls to make, I did two and three cakes in a row.  I usually just leave mine in the fridge overnight and start making the cake into balls the next morning.  Yes, it is very time consuming!


Wax paper goes on a cookie sheet, I use the sheets that have sides to keep them from rolling around.  Then, I like to use a melon ball scoop to make them a more uniform size.  You will need to stop and wash your hands at times.  When it starts getting more room temp, your hands seem to get sticky.


Scoop it out, roll into ball, plash on the sheet and keep going til you are out of dough.  I can get about 3 dozen balls out of one cake mix.  Slide your cookie sheet(s) into the freezer.  You can dip them the next day.  IF you are not dipping them the next day, take them off the sheet and put into either an airtight container or into baggies.  I put mine into baggies and just stacked them, 500 balls take up a lot of space!  


I use Almond Bark for my dipping.  I know folks that use the chocolates from the Cake Carousel in Richardson, and some that use the bakers chocolates sold at the craft stores in the Wilton Cake section.  I just have not tried any of the others, and have stuck with what works for me.  I try to heat about half the package at a time, and there are good directions on the package. It takes "about" one package of Almond Bark per cake mix.  I hope that this has not confused you.  
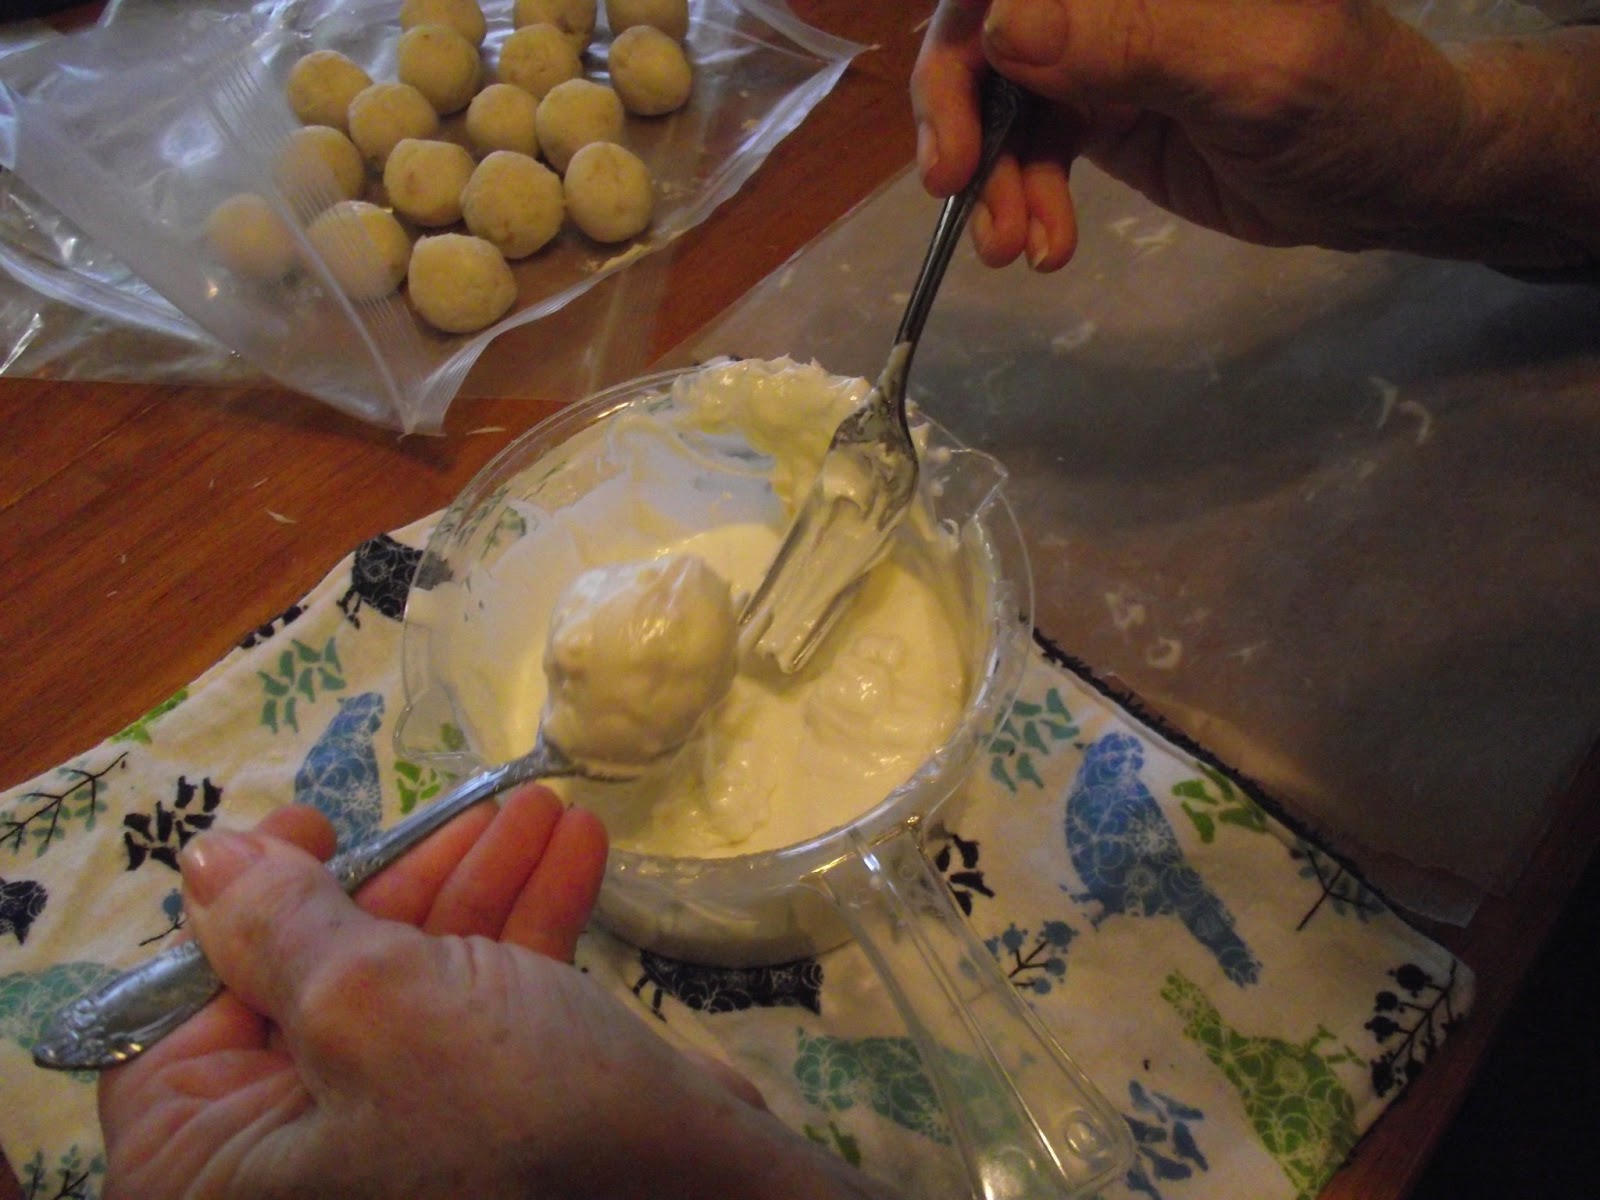


You can see as my friend, Linda, is dipping this one...my preferred method of dipping is two forks.  Drop the ball in, scoop it out, and tap it a few times on the side of the bowl to get extras off. 


Some will look smoother than others, and I think that is partly due to the creaminess of the Bark. Ooops, let's back up just a bit...you can see my bag of cake balls that I cut open so that I could get to them.  Be sure to take them out to start a small room thaw for a few minutes BEFORE you heat up your Bark.  IF you dip these when they are straight from the freezer, they might crack or you might get a hole with some cake snaking out as they cool and have to have somewhere to sweat.  


From the fork, it goes back onto some fresh was paper to dry, harden and cool.


Because these were for a wedding, I took a small knife and trimmed all the drips of each one after they had hardened.  They just look nicer.


This is just to show you how you can get the frosting too hot and burn it!  Ewww....that one got thrown out.


This is from my chocolate ones, and you can just see the difference.  I will say that the chocolate Almond Bark always seems to melt and dip so much better than the white does.


After the balls have been cooled and trimmed, you are ready to put them into containers for eating or transporting.


This is what 480 cake balls look like!  Wow! Now, we did not serve them like this.  We had tiered glass plates that we displayed them on.  I think that I will have some pictures to share from the wedding in my next post and you should be able to see them on display then.

Well, that it is for now, and I hope to be back more regularly now.  IF you have any questions about the cake balls, please just leave me a comment and I will get back to you on it.  See ya in a couple weeks!!!  Stay warm, it is cold out there!


Tuesday, November 20, 2012

Wow!!! Ever feel like you are so far behind that you will never, Never, NEVER get caught up?  And, I am finding that a lot of this feeling is brought on by ourselves!  Stop and think about it...that to do list...who says that all that stuff has to get done?  Who says it has to get done today?  For the crafter/artist, who bought all that stuff for those projects that now have to be done?

I have found that lists are great...if you will actually go back and look at them.  I sat down the other day and just started listing everything that popped into my little brain for a "to do" list.  I listed stuff like the 400-500 cake balls that I am making for my son's wedding in December, craft projects, paintings, outdoor chores,...

Then, I went a step further and broke the projects down into sizable pieces.  Let's do a couple here.  
Cake balls.  Now, that is a large job that won't get finished in one day.  I will start baking them weeks before, and I actually did over 100 last week and they are in the freezer waiting to be dipped. So, I deleted the Cake Balls and typed in... bake all the chocolate cakes and mix/chill for cake balls.  This gets typed out again for the vanilla and for the lemon ones.  Then, I also type out -> Roll out chocolate (do for each flavor) balls and freeze.  Don't forget to go back later and put them into baggies.  Last, I put the dipping.  -> Dip all cake balls.  This time I won't put the flavors because I am having a dipping party with friends.  Anyone who comes to help gets to take home a dozen cake balls.  So, now you see how cake balls is broken down into a sizable task.  And, as you do a step, do not delete it from the list...go into fonts and down at the bottom use the strike-through and just mark it off the list.  This way, you can actually see that you have accomplished something.  

Let's do another one.  I teach painting classes at my home on Mondays.  So, I am forever tracing out patterns and then painting up the projects. My list for this would look something like the one below.
Draw off patterns for Spring classes.
Prep all the surfaces for Spring painting classes.
Transfer patterns and pull paint colors.
Paint samples up for the Spring classes.

Again, do the strike-through when I finish each step.  The idea is to get to mark one to three things off my list each day, depending the size of the task.  So far, I am happy with what I have accomplished and I have been doing this for two weeks.  When I am in the art/craft room and see some project that I had forgotten about, I add it to the list and don't stress over it.

Another thing, I saved that list to my computer with a shortcut to the main screen so that I see it every time I turn on the computer!!!  Here is an actual portion of my list and what it looks like...


Dust before spaghetti dinner.
Wrap Christmas gifts.
Clean living room carpet and Andrew’s room carpet.
Fix fence.
Fix kids leaky bathtub faucet.
Trim the bushes out front.
Make poster for seating at wedding.
Finish wedding afghan.
Finish Griffin’s afghan.
Get shoes for wedding.
Pull patterns for “cute” Halloween for 2013.
Copy house pattern that is Christmasy.
Make shrugs out of leftover yarn.
Make pacifier holders with fabric and ribbons.
Make seasonal towels.
Make my placemats.
Make my bird towels.
Paint the candle/toilet paper wrappers on canvas paper.
Purchase hummingbird, Kirklands.
Sell magazine rack.

So you see, there are things on the list that really don't matter until sometime next year.  But, if it is something that is going to keep coming to the front of my thoughts of something that has to be done, I find that I can let it go if I have it written down.  Your task might be sewing a quilt.  Break it down into bite sized steps so that it isn't so overwhelming.  It is actually fun to go into the file each day and cross things off.  And it can be chores that are seasonal, just add them back in when it is time to do them again.

I hope that you find this helpful.  It seems kinda basic and simple.  I know that folks make written lists all the time, and to be honest with you...that is what I used to do.  But then, I very seldom got to mark off everything, or never got to really add everything that needed to be done.  How often have we made a list and just looked at it...felt so overwhelmed that we didn't do anything that was on it?  Well, I hope that this encourages you to get something done each day! 

My list is three pages long and I am off to tackle another project this morning.  Dunno when I will be back on again, but I hope it will be sooner than this last time.  We have had a lot going on.  Things were added to the list that we didn't plan on...our fence fell over into the yard from high winds, we sold a car, I had surgery for a tumor in my colon (everything turned out fine in the end) and that put things on hold for a few weeks,...it seems never ending doesn't it?  

Hope that you have a wonderful Thanksgiving and pray that this finds you safe and well!!! - Pam


Thursday, October 18, 2012

Not JUST Rocks !!!

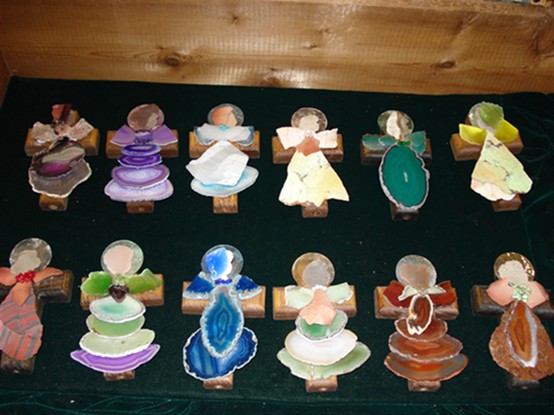
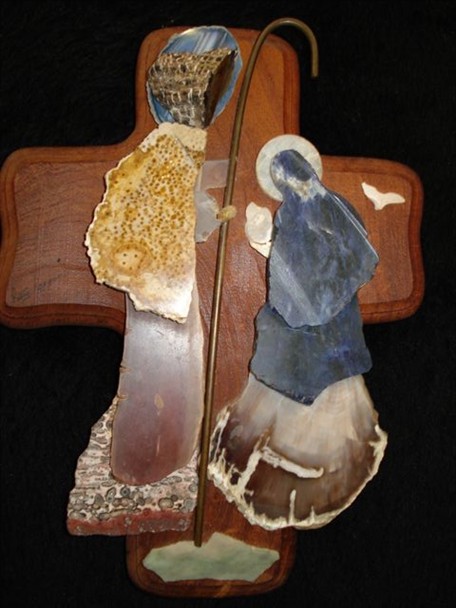
These rocks really ROCK, and the creator is so Blessed by God.  I can't tell you how exciting it was to get to meet our artist for the blog today.  My goosebumps had goosebumps!!!  The stories that she told and just the artwork in itself was awesome to look at.  Now I am rambling, just thinking about that day when we met.  Without further ado... Meet my new friend, Patty!!!

She does art with rocks, and not just any old rocks.  The best thing that I can do is show you some of her booth and then really, Really, REALLY encourage you to go take a look at her website and read her story!!!  This is one remarkable lady that hit that spot where we don't know what to do and just call out to God and go on a seeking spree.  And, when He answered, she was all ears!!!

WELL THAT JUST BITES!!!  I have been trying for over 45 minutes to get the pictures to download onto here and I just can't get it to work.  Dunno what is up with the computer or the pictures.  So....guess you will have to go straight to the source...

http://www.zamzone.com/angels/default.asp   These are a few of her works....  and also there is a link to meet the artist, you can read all about her.  Some of her smaller pcs are quite affordable and her email address is right there on the site!

OK...I did manage to figure out to upload from her site. Patty's works are truly amazing!!!!  One day, I hope to own one of her creations!  The way they catch the light is just amazing!  IF you drop her a line, tell her that Pam said "hello", not that she would remember me,...


See ya in a couple of weeks.  IF you are local, I have two shows coming up...
This Saturday at

Parkerfest. Event with craft show, live music, complimentary food and non-alcoholic drinks.
Saturday, October 20, 2012
Parker Preserve, Parker Road and Gray Lane (outside)
11am to 4pm

And then, my largest show of the year is the following weekend at JJPearce High School...I am still set up in the front large room to the right of the fireplace, stop by and say hello!
October 27 and 28.  See their website for more info and directions.


Friday, October 5, 2012

Fabric Police Please!!!

Well, I said that I would show you the cabinets and why they are holding up the table this week.  So, let's get right to it.


See, there is the $7 cabinet on the left and the one I already had on the right.  The one I already had is just a bit shorter, so there is a piece of wood between the tabletop and the cabinet to make up for the difference, doesn't even show!  Now, the cabinet on the left after I covered it with some sticky backed paper that I got at Big Lots for $1 a roll, it took two rolls. Take a look at this link of the contact paper that is out there, wouldn't that be nice on the file cabinet!!!


Is that not awesome!!!  I love it.  Can you tell it is blue or was blue?  Well, when you open the drawers you can, but who cares!


This is an open drawer, and you can see right here at the bottom of the picture where I didn't cut the paper straight and there is the old blue metal.  You can see it again in the picture below. Look at all the blue!!  Just makes me smile to know that I get it so cheap and redid it to match my room!  So there is a small dent in the side there, I don't care cause it works!!!


The above and below pictures are from my other cabinet, the one that I bought years ago that is woodgrain looking.


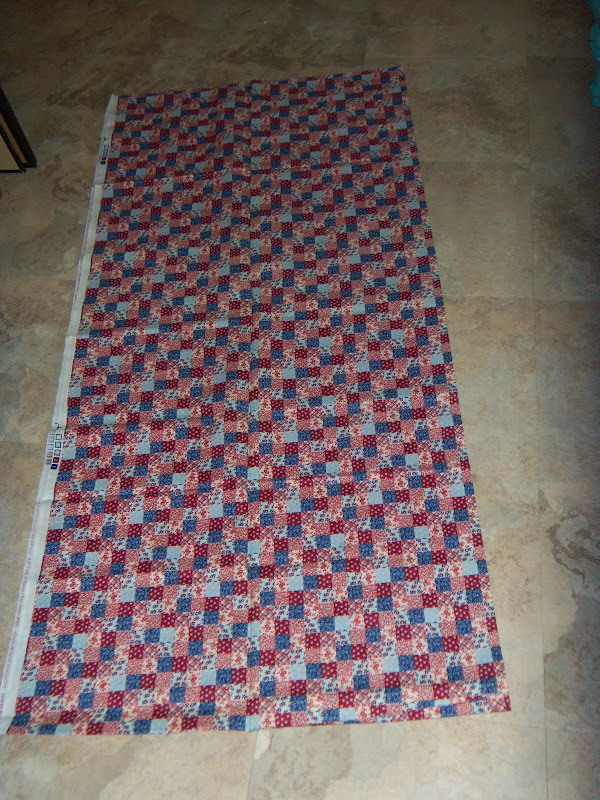
Yes, I have quite a stash of fabric, and if I could remember where I saw this done at ... I would give them credit.  I love my fabric in the drawers, I can see it all at a glance and it is organized.  I have kids stuff, holiday, solids, novelty,... and it isn't out getting faded in the sun or dusty on a shelf!
And then, I still had some extras, so it is in the containers below.  They slide right under the edge of my desk.  Those are the ones that I don't get into as much.  Hope to work down to where I can put my felt in there soon.


How to get the fabrics to fit... you will need some of the hanging file folders (sit and cut them all in half), and the big frame thingy if you are using a file cabinet.  These Sterlite Boxes have ridges and you won't need the stand for them, mine were from WalMart.
The way that I prepared my fabric was very basic.  Fold it in half long ways so that it looks something like this next picture...


Then, fold it again...now it should be about the width of the file folder.


Below, one of the file folders that I cut in half.


Now, start folding your fabric so that it is just a bit smaller than twice the height of the folder.  


Now, when you fold it over the folder it won't drag on the bottom of the cabinet interior.  Sometimes, I had to be creative with how I folded the fabrics.


Now you are ready to put it into the drawer.  How cool is that?  I really like my drawers all done up like this, just need to stay out of the fabric stores for a while!  Like that is gonna happen.


Next time on Tinkering Around... I was out shopping with a friend and we met a lady that makes angels and stuff out of rocks...this is a must see and I will share when we get together again.  Till then, do something creative.  Leave me a comment, let me know if anything on the blog is helpful and what you are doing in your neck of the woods.  See ya in a couple weeks.


Wednesday, September 19, 2012

Making a Large Work Space

I have redone a couple things in my art/craft/sewing room, and I just have to share!!!


Do you see this knot-holed sheet of plywood?  That is my base, and you get it at Home Depot for around $25.  They have a cheaper one, but it isn't as thick.  No need to do the expensive stuff, you are gonna wrap it with fabric.  Measure the length you want your work station before you go for your lumber, mine was 80".  Oh, BTW, Home Depot will cut it for you for FREE!!!!  So, that also meant that I could lay down my front passenger seat, both back seats and get the wood home in my little Neon!  Anyway....had them cut it at the 80", and save the rest for another project.  Then, had the guy to cut that down the middle longways, like a taco fold.  You do not want two squares, do it long ways. 

Make a run to the fabric store if you don't already have a stash at home, and get enough fabric to cover you board.  I got several yards, split it long ways and did both boards.  Then, put the extra fabric in my cabinet.  More on the file cabinets of fabric on another post!!!


It is an art/craft area, so I chose this teal/aqua blue color.  Work with the fabric and get it all laid out there as smooth as you can.  A friend to help is great at this point, I was home alone, so I just laid the board on it and kept tugging and pulling till I got the wrinkles and gathers out.


Now you are gonna think me crazy, but if you have a staple gun...you can use it, but I went out and bought an electric staple gun.  I used my old hand one a lot, but it is rough on the hands sometimes.  There are a few good brands out there.
Take the time to check it out!!!  These are great!!


You are gonna fold up the long sides of the board and start in the center and work out.  Don't worry about the staples that don't go all the way in, they hold and that is all you need at this point.


See my messy staple job, doesn't matter, this is step one.


Ah, the ends.  I am going to show you how I did the corners, but work with it and do what works for you.


I think that it is easier to show you what I did than to try and just explain it.  It is what I think of as boxing or mitering the corners.


Then, fold that flap up and over.  Put some staples in along the way to help it hold if you need to.  Don't forget to stop from time to time and look at the other side to be sure that you have not gotten ripples in there, pull it taught again if need be.


There ya go, tack away.  Oh...


See that double fold on the corner, it won't show on the front, so let it go!


This is both the long sides and one end finished.  Just repeat the same process and let's do the other end now.


Can you see some of these staples are sticking up a bit, take a hammer to them and just beat them down.  If they go a bit slanted on the way in, don't worry bout it.  Remember, this is just layer number one.


Inspect your work.  Hey, pretty good isn't it!!!


I decided that I wanted a stripe of fabric on my table top.  I turned under the right hand side and left the left side sticking out because I am laying something else over that.


This second strip of fabric covers that raw edge.  


Flip the board back over and staple away.  


Now, I am not too picky on staples, but you can see the one that I circled here.  Even I had to get a pair of pliers and yank that one back out.  lol


Next layer, now you wanna make sure that everything is stapled on good.  This is the clear plastic that is sold at the fabric stores.  It is pretty well sold at all of them, so you pick what is close or what you have a coupon for.  I got a medium weight, I knew that I would be dragging stuff across my work area and needed it to hold up.  That thin stuff...it will stretch and tear, just not worth having to re-do it later.


Before you lay that board down, you better check out your fabric.  It has been on the floor/table and you would surprised what all has grabbed onto the fabrics.  You can't see this??  Take a look at the next picture.


Chunks of fuzz, dirt, hair...get it off, ALL of it!!!  Once that plastic is stapled on there and you flip that board over, it is magnified!!!  Don't ask me how I know!!!  I put that spot at the back of my table and put something on top of it.


Alright, same process all over again.  Pull it all flat, fold up the long sides first and staple away.


Then, do the short ends.  Yeah, it starts to get a bit bulky here.


Oh drats...can you see where I circled it in the picture.  A chunk of fuzz down on the sided.  I am not pulling it apart, it won't really show once I get it all in place.


Wow!  Might not look like much in the picture, but this is great!  Can't wait to get it in the room and start using it!


Love the fabrics that I picked too.  I will put this one under the window that looks out to the backyard where all our birds gather.  I will do another one on the other side of the room for sewing, and use a different strip of fabric on it, something that reflects my love of sewing.  They will be great sharing the room because they will be the same base colors.


Here is the other one I did.  See how nice with all my sewing stuff.  Yes, that is stickers all over the sewing machine.  My daughter did most of those on there over 20 years ago, oh the memories, I had to leave them there! Surround yourself with what you need to do the job, but also include some fun stuff that you like.  I even put a measuring tape down the edge of my sewing one, just handy to have there.

Don't those filing cabinets look a sight.  The blue one was just purchased at a yard sale for $7.  I got a call from a friend that informed me that Dollar Tree just happened to have a peel and stick paper in wood grain.  Now, they both match.  I just measured and stuck it on, took two rolls.  Thank you for the call Linda, I really like the look.
Ok, I think this is enough for this week.  I will be back soon to show you what the cabinet looks like and why there are cabinets there instead of shelves. Oh, on the opposite wall, is the other table, is is on wire shelves that I got at Target.  They are sturdy and are holding file boxes of photos waiting to be organized.
Now I am finished.  See ya next time.  Feel free to leave me comments, I love hearing from you!!!!