Tinker Around

Welcome to my blog. It is full of basic projects and tutorials for things that I have done and feel like others out there would benefit from learning too. Be sure to take time to leave me a comment. Thanx, Pam
Showing posts with label distressed. Show all posts

Friday, April 20, 2012

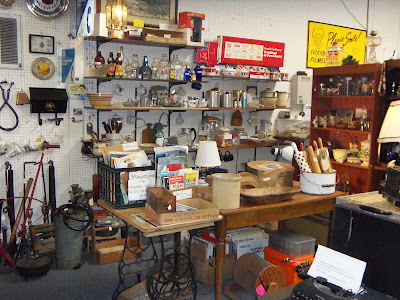
Shopping the Antiquibles Antique Mall

Happy Friday!!!  What better thing to share today...a shopping trip!!!  I went with friends this last week to one of my favorite shopping places  *drum roll here*   


A portion of an antique store is devoted to Barbara and David Hays' 7,000+ dog-related collectibles, accumulated since 1967.
Address:
94300 I-35 N, Waco, TX
Directions:
4 mi. north of Waco, I-35 Exit 345 east side of Frontage Rd in Antiques Mall in the back.
Admission:
Free.
Hours:
Daily 10 am -6 pm. Closed Christmas, Easter, Thanksgiving. (Call to verify)
Phone:
254-829-0120


And now, I will let the pictures speak for themselves!  Needless to say, we spent quite a while here.  It is a great day trip from Dallas area.  Be sure to wear comfy shoes, and it does get warm in there with all the walking and shopping.  They are great about coming and emptying your arms while you shop though, and that is awesome!  So, without further ado...


Did you have fun seeing all this??  And it isn't even a drop in the bucket of everything there!!  Want another idea of how BIG this place really is...


Yep!!!  I had fun!!!!  When you go, be sure to tell them that Pam with the blog sent you!  Have fun and feel free to leave comments below!  See ya in a couple of weeks!

Wednesday, July 20, 2011

Shabby Wall Mirror Re-do

I am sure that you all have seen those large mirrors that look time worn, and they cost like $30 or so.  Not mine, but you already new that!!!  lol.  I pulled out this old mirror that I had painted from brown to gold ages ago and was no longer using.


Here you will see me putting on the white paint, just your bottled craft paints work fine.  Instead of using painters tape, this time I just stuck an old sheet of paper up next to the frame and went for it.


It could well take more than one coat of paint!  


Now, you can wait for it to dry, OR get impatient like me and take a damp paper towel to it.  Amazing, didn't know if it would work until I did it.  That is all part of crafting, just getting in there and trying things out!!!


Trust me, it looks much nicer in person.  And then I went to the hardware store and bought some chain and some little decorative wood pieces.  


The wood pieces had to be painted and distressed so that they would match, and then I glued them on.  After adding chain to the back, it was ready to hang!  I did not hang it by the chain!  I was so sure of the strength, but just made it look like it was hung that way.  


I did measure it out, so even though it might look crooked here, it was fine.  After the chain is up, the mirror went on a separate nail.  I thought that it turned out nice.


Well, that is it for the mirror redo.  I hope that this will encourage you to go out there and re-purpose some stuff you have laying around.  A bit of paint goes a  long way, and it is easily changed again later...it is only paint.

We are leaving on August 8 to head to So.Korea to see our daughter for a few days. (Our adult son will be holding the fort down here.  Should I be frightened???)  She is teaching English there for a year or two, in one of their elementary schools.  So...the blog is gonna be a bit sporadic til we get back and then a lot of it might be pictures from the trip.  Stick with me, we will get back to crafting!!!