Tinker Around

Welcome to my blog. It is full of basic projects and tutorials for things that I have done and feel like others out there would benefit from learning too. Be sure to take time to leave me a comment. Thanx, Pam
Showing posts with label sewing. Show all posts

Friday, March 7, 2014

From Headboard/Footboard to Bench

This entry is going to show you how easy it is to take a headboard and footboard and turn it into a bench.  So... mainly, there will be lots of photos.  By now, you should know that I am a visual person... hope you are too.


First, purchase a headboard at a yard sale or flee market.  IF you are lucky, you will get a matching footboard.  IF you are REALLY lucky, you will get them both for $20.


You can see here how the footboard was cut down for the arms.  The footboard base was pulled out and put across the front.  Then some old 2x4's were used for support bars.


Then, it gets a seat put on $10.  This is held together with lots of screws and some wood glue.  


Last, spackle up the holes and any imperfections, let it dry, give it a gentle sanding, and put on a couple of coats of paint with primer.  


I went to get a cushion that would fit the bench, and they didn't make them the right length and depth.  So, the next best thing is a body pillow for $9.99 at Garden Ridge.  I know, it looks really fluffy, but they usually smoosh down over time.  Then, a quick run to Anna's Linens and I purchase another curtain panel that matches my living room for $15.


Ok... now I could have left this without the cushion, but that is not very comfy for folks to sit for very long.  The whole purpose of this is that it sits inside the front entry and is carried into the front room for extra seating for our Bible Study Group and family get togethers.


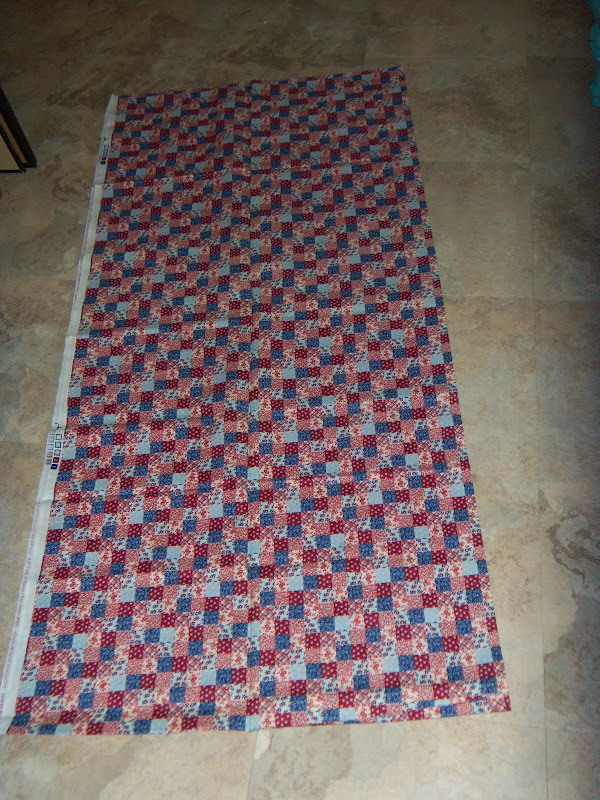
I didn't realize how important this part was til later...can you see how wide and long I left it?  I knew that it would puff up some, and that would make it smaller all around.


These are lined curtains, and that makes them thicker, but they still sew up just like anything else.  Start with one seam down the length.  I didn't cut anything off of the sides, just trimmed it in length.


On the picture above, at the top left, I put a pin.  Then, I take the seam from the right and flatten both out and pin them together.  


Fold that long seam out flat, no reason to run the presser foot over a bunch of fabric and lining if you can split it out flat.


This shows it a bit better.  Then, take a seam across that entire short end.  


This shows it seamed up.  


I went ahead and turned it and stuffed the pillow inside to try it on for size.  


The corners are really pointed, and I didn't like that at all.  So, I am off to box the corners.  Do you know how to do that?


It is just a seam across the triangle at the corner.


It will look like this when it is finished.


I think that a three to four inch pocket will be deep enough.


Ok, here we are again, wrong side out.  There is the corner.  I am going to take that and fold it open so that the seam... oh, just see the next picture...


Fold it flat, measure down for the depth...


Take the seam.  Do it again on the other corner.  Remember the other end is still open, we made a giant pillow case.  


Time to do something with this other end.  Sold that seam open just like you did on the other end, BUT... only sew in about six inches from each side.  You need enough room to box the corners, but if you pillow is as large and fluffy as mine... you need all that other area to stuff the pillow in.


This end looks a bit different than the other end because of the curtain being hemmed.  But you can see where I came in just a bit on each side and then "boxed" the corners again.  Boxing the corners is also how you take a flat tote bag and make a bottom where it can stand up instead of laying flat.  IF you are interested in a tutorial on those for shopping bags, just post a comment below and I will work one up.


Turn it part way and start stuffing in the pillow as you finish turning it.  What a chore... this is gonna be tight!


I finally get it in, but it doesn't look so good.  It takes me crawling around on the floor and pushing and pulling a bit to get it all squared around inside.


Now, how bout those corners!!!  Don't those look so much better that the pointy ones that we had to start with?


The area that I left open for stuffing will get pinned and hand sewn shut.


Hmmm... nope, don't care for it.  Sorry, it is just way too fluffy still.  


Buttons!  That is what it needs, some tacking with buttons.  That will smoosh it down and make it flatter... I hope!


Have you ever sewn with a button and the knot keeps popping through the fabric?  I came up with a way to keep that from happening here.  Well, maybe others have done it before, I dunno...anyway, it worked.  I took a really long length of thread and folded it in half, and then in half again.  I don't wanna go through this pillow any more than I have to, so I am doing the equivalent of four threads at one time.  Thread the need leaving the loop at the long end and slip on a small button...


 Take the needle and go back through the loop and pull it up tight... just stay with me, I think you will understand.


Now, this button is my "knot" on the underside of the pillow.  I will run the thread through the pillow and out through the top seat area, then through a large button and back down through the pillow.  I go back and forth a couple of times, pulling it very tight to make a "tufted" area.


You can see here, the bottom button that acts as the "knot".


Here is the top button on the other side.  This is almost impossible to do by yourself with a pillow this large.  I got the longest needle I had and then called a friend to come over and hold it as smooshed flat as she could while I did the hand sewing of the buttons.  These buttons are not so cute, but that is fine with me for now.  I can always go back and tack another button on over the top of these if I see something on sale sometime.


Remember when I said that I left the fabric longer and wider than it needed to be?  Look how much it all drew up once it was stuffed with that pillow.  Now, we have already sat on it a couple of times, and it is very comfortable.  You know how after sleeping on your bed pillow for a bit it gets all flat and you have to fluff it.  I am still counting on that to happen with this, and then it should fit the bench just right.  All in all, I am very happy with it.  

A very special thanx to Linda and Phil.  Linda is one of my shopping friends and puts up with me turning down lots of "deals" before I settle on "the" piece that I want.  And Phil, he is love of Linda's life.  They are retired and do lots of shopping and exploring together.  He is actually the one that made my drawings and thoughts into reality.  So, thank you both!!!

Saturday, January 18, 2014

Sewing Area... and Painting and Scrapbooking

I decided that the "studio" was just getting out of control.  So, I began the overhaul, it was just that bad.  We have been bringing in stuff from my dad's that was mom's work room.  It was ok to start with ... but then a box here, a box there.  Memo to self, put stuff up when you bring it in and if there isn't a place for it... then don't bring it in the house to start with.

Below, is a picture of my very first sewing area, the machines had to go below the pop-up tables.  Just goes to show, that we can do something with a space and then upgrade as we can afford it.


http://tinkartist.blogspot.com/2012/09/making-large-work-space.html   This link will show you how to make your own table out of a sheet of plywood from Home Depot.  This is the most reasonable priced way of doing things that I have found.  Please feel free to share your room in my comments!  The picture below is how I had the table this last time.  But, the supplies were all in a bookcase across the room and the serger machine was kept in the closet.  Just too time consuming to get to what I needed for a project, so I just didn't use the space for anything but a junk surface.

Also... that file cabinet to the left (below) is covered with woodgrain sticky back paper now too.  My fabrics are in those cabinets hung by type on file folders.  That is also shown in my blog.  Keeps fabrics clean and no fading from the sun, plus they are at your fingertips with just a pull of the drawer!


The next picture show how the room looks now.  I must say, it is very workable now.  Everything right there where I can get to it!  The over-sized mat for cutting is standing at the end of the table with my tabletop ironing board.  


I hope you like how I labeled everything for you and that maybe something here will help you in your sewing space.  Click the picture and it will be larger and easier to read all my notes and labeling.

A friend asked me this week if we ever get to where we stop changing things in our "work spaces".  I told her that I didn't thinks so.  It is the nesting trait that we have as women. So... don't forget to check back often to see the next part as it is revealed, or just follow and it should let you know when I update the blog.  There will be at least three parts to this room makeover.

So... hope to see you soon, as I am excited about this and want to get it finished up pretty quickly.  Next entry will be the painting area in the room. -Pam


HEY!!!!!!!!!!  I AM BACK!!!!!!!!!!!!!   I am finding it easier to just add the pictures of the rest of the room here, instead of starting another new post.  So...


Below is the left and right sides of this painting area.


This next picture is moving on around.  The new work space is really deep.  I used a 2x4x10 to make the legs for shelves.  Then, the top shelf is hung with the $2 brackets that are all wood and sold at Home Depot.  The entire new scrapbooking work area was made with one sheet of plywood and the (2) 2x4x10s.  I am loving all the space!


All the magazine boxes are decorated with the type stickers that are in each one.


Had to find a way to keep the Sizzix right at hand!


There is a plate with an old clock pulled apart that is a project.  All sorts of fun stuff.  But, it is all organized now.  Hope you have enjoyed!

See ya soon!!! -Pam

Friday, October 5, 2012

Fabric Police Please!!!

Well, I said that I would show you the cabinets and why they are holding up the table this week.  So, let's get right to it.


See, there is the $7 cabinet on the left and the one I already had on the right.  The one I already had is just a bit shorter, so there is a piece of wood between the tabletop and the cabinet to make up for the difference, doesn't even show!  Now, the cabinet on the left after I covered it with some sticky backed paper that I got at Big Lots for $1 a roll, it took two rolls. Take a look at this link of the contact paper that is out there, wouldn't that be nice on the file cabinet!!!


Is that not awesome!!!  I love it.  Can you tell it is blue or was blue?  Well, when you open the drawers you can, but who cares!


This is an open drawer, and you can see right here at the bottom of the picture where I didn't cut the paper straight and there is the old blue metal.  You can see it again in the picture below. Look at all the blue!!  Just makes me smile to know that I get it so cheap and redid it to match my room!  So there is a small dent in the side there, I don't care cause it works!!!


The above and below pictures are from my other cabinet, the one that I bought years ago that is woodgrain looking.


Yes, I have quite a stash of fabric, and if I could remember where I saw this done at ... I would give them credit.  I love my fabric in the drawers, I can see it all at a glance and it is organized.  I have kids stuff, holiday, solids, novelty,... and it isn't out getting faded in the sun or dusty on a shelf!
And then, I still had some extras, so it is in the containers below.  They slide right under the edge of my desk.  Those are the ones that I don't get into as much.  Hope to work down to where I can put my felt in there soon.


How to get the fabrics to fit... you will need some of the hanging file folders (sit and cut them all in half), and the big frame thingy if you are using a file cabinet.  These Sterlite Boxes have ridges and you won't need the stand for them, mine were from WalMart.
The way that I prepared my fabric was very basic.  Fold it in half long ways so that it looks something like this next picture...


Then, fold it again...now it should be about the width of the file folder.


Below, one of the file folders that I cut in half.


Now, start folding your fabric so that it is just a bit smaller than twice the height of the folder.  


Now, when you fold it over the folder it won't drag on the bottom of the cabinet interior.  Sometimes, I had to be creative with how I folded the fabrics.


Now you are ready to put it into the drawer.  How cool is that?  I really like my drawers all done up like this, just need to stay out of the fabric stores for a while!  Like that is gonna happen.


Next time on Tinkering Around... I was out shopping with a friend and we met a lady that makes angels and stuff out of rocks...this is a must see and I will share when we get together again.  Till then, do something creative.  Leave me a comment, let me know if anything on the blog is helpful and what you are doing in your neck of the woods.  See ya in a couple weeks.