Tinker Around

Welcome to my blog. It is full of basic projects and tutorials for things that I have done and feel like others out there would benefit from learning too. Be sure to take time to leave me a comment. Thanx, Pam
Showing posts with label recycling. Show all posts

Thursday, April 14, 2011

Uber Easy Recycled Boxes

Today, I am just doing a short post on a couple of boxes that I recycled.  You know, anytime that you can recycle instead of having to toss it out or purchase new, you are doing a service to not only our environment...but to your wallet!!

Here is a candy box that my son had tossed into the trash.
Just need a couple sheets of scrapbooking paper, scissors, paper glue, pencil, flat ball feet, and some embellishments.  I cut and glued paper all around the outside and the top and just the inside top, oh and on the bottom.  Just anywhere there was writing that I didn't want to show.  I didn't mind some of the inside decorative papers, but the inside top had a layout of the candy...so that had to get covered up.  Oh, and the box still smells yummy!!  You ready to see the after?  Wait for it...


That top pearly piece is all one peel and stick by Prima.  
They have a ton of stuff for scrapbooking and all sorts of altered art.  This would have looked fantastic with some of their large flowers around one corner!  I could have also taken another flat ball that I used for the feet and put on top for a handle knob.  Let your imagination run wild when you do a project like this.

Let's take a look at another box that I did.  This one was purchased at a clothing place and came with a bottle of perfume inside.  My daughter doesn't throw much in the trash, I just find it on my art table.  See on the before how there is a ribbon coming through the slit...that has to be dealt with when covering a box like this.
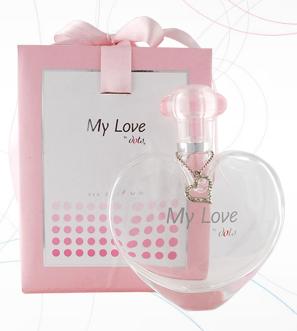
Now, because it came with a bottle in it, I also had to rip the inside out.  An easy fix to that was to just line it with felt.  I used an exacto knife to cut a slit in my paper to let the ribbon slide through.  Used some more balled feed and stickers to coordinate with my papers.  


Now, before we go...I also have to tell you about the bestest (and yes, that is a word!) glue company around - Helmar.   They have a glue for every project you can think of.  Glue dots for making things dimensional, fabric glues that will grab the fabric really well, paper glues that don't ripple and buckle, glues for jewels, and a glue that is so strong that you can bond most anything!!!  http://www.helmarusa.com/     I just wish that I had more of their product!!! 


Ok, this week I listed two of my favorite folks - Prima and Helmar.  They are also on facebook with all sorts of giveaways all the time, be sure to tell them that Pam sent you!  Please take the time to go take a look around their websites, they are chock-full of ideas and product!  See ya next week, Pam.


Wednesday, March 9, 2011

Create EXTRA Hidden Storage Spots

This week, I want to let you into my dining room.  I have to keep all my Christmas dishes in there, as there is not enough room in my kitchen.  So, I put two floor to ceiling bookcases in the dining room and put my dishes in there, but there are not doors on the bookcase and everyone can see my out of season mess.  Not a pretty site.  Look at the plates, glasses, mugs and other holiday stuff....tacky!!! 

Now, let me show you my solution.  This is a bunch of damaged or outdated obsolete books that were given to me.  I take an exact-o or razor and cut off the front and back cover, NOT the entire cover, leave about 1/4 to 1/2 inch of the front and back in tact with with book.  Next step, take a long piece of foam core (or you could use an old large appliance box) and cut it to fit inside the shelf.  Cut an extra couple of 3 inch pieces to use as feet and stabilizers.  


See how I hot glued the extra "foot" in place.  Put one on each end and then one in the center, placement is not a science, anywhere is fine.  Then, you take and hot glue all the book spines on the other side, make sure they at right next to each other, you want no white space showing.   Here is another view.


These can be very useful, you just have to make sure that you are putting books of about the same height together.  These make great hiding places for all sorts of things around the house.  Just be sure that the books you are using really are not collectors and are really obsolete.  With computers, more and more books are falling into that category, but I am not a book butcher.  Wouldn't want to send the wrong kind of message with this post.  I love books.


I got right up close with this picture so that you can see all the stuff behind the books, hidden storage is great!


Here is an after shot.  All the Christmas dishes are hidden and I use the rest of the bookcases to display stuff that has been passed down from grandparents and great-grandparents.


I get a few emails each week with comments on my blog, so glad that you are enjoying.  Feel free to post here on the blog, I think you just do it with your email addy (and that is keep hidden).  Next week...Painting little items without getting more paint on you that on the item.