Tinker Around

Welcome to my blog. It is full of basic projects and tutorials for things that I have done and feel like others out there would benefit from learning too. Be sure to take time to leave me a comment. Thanx, Pam

Wednesday, September 19, 2012

Making a Large Work Space

I have redone a couple things in my art/craft/sewing room, and I just have to share!!!


Do you see this knot-holed sheet of plywood?  That is my base, and you get it at Home Depot for around $25.  They have a cheaper one, but it isn't as thick.  No need to do the expensive stuff, you are gonna wrap it with fabric.  Measure the length you want your work station before you go for your lumber, mine was 80".  Oh, BTW, Home Depot will cut it for you for FREE!!!!  So, that also meant that I could lay down my front passenger seat, both back seats and get the wood home in my little Neon!  Anyway....had them cut it at the 80", and save the rest for another project.  Then, had the guy to cut that down the middle longways, like a taco fold.  You do not want two squares, do it long ways. 

Make a run to the fabric store if you don't already have a stash at home, and get enough fabric to cover you board.  I got several yards, split it long ways and did both boards.  Then, put the extra fabric in my cabinet.  More on the file cabinets of fabric on another post!!!


It is an art/craft area, so I chose this teal/aqua blue color.  Work with the fabric and get it all laid out there as smooth as you can.  A friend to help is great at this point, I was home alone, so I just laid the board on it and kept tugging and pulling till I got the wrinkles and gathers out.


Now you are gonna think me crazy, but if you have a staple gun...you can use it, but I went out and bought an electric staple gun.  I used my old hand one a lot, but it is rough on the hands sometimes.  There are a few good brands out there.
Take the time to check it out!!!  These are great!!


You are gonna fold up the long sides of the board and start in the center and work out.  Don't worry about the staples that don't go all the way in, they hold and that is all you need at this point.


See my messy staple job, doesn't matter, this is step one.


Ah, the ends.  I am going to show you how I did the corners, but work with it and do what works for you.


I think that it is easier to show you what I did than to try and just explain it.  It is what I think of as boxing or mitering the corners.


Then, fold that flap up and over.  Put some staples in along the way to help it hold if you need to.  Don't forget to stop from time to time and look at the other side to be sure that you have not gotten ripples in there, pull it taught again if need be.


There ya go, tack away.  Oh...


See that double fold on the corner, it won't show on the front, so let it go!


This is both the long sides and one end finished.  Just repeat the same process and let's do the other end now.


Can you see some of these staples are sticking up a bit, take a hammer to them and just beat them down.  If they go a bit slanted on the way in, don't worry bout it.  Remember, this is just layer number one.


Inspect your work.  Hey, pretty good isn't it!!!


I decided that I wanted a stripe of fabric on my table top.  I turned under the right hand side and left the left side sticking out because I am laying something else over that.


This second strip of fabric covers that raw edge.  


Flip the board back over and staple away.  


Now, I am not too picky on staples, but you can see the one that I circled here.  Even I had to get a pair of pliers and yank that one back out.  lol


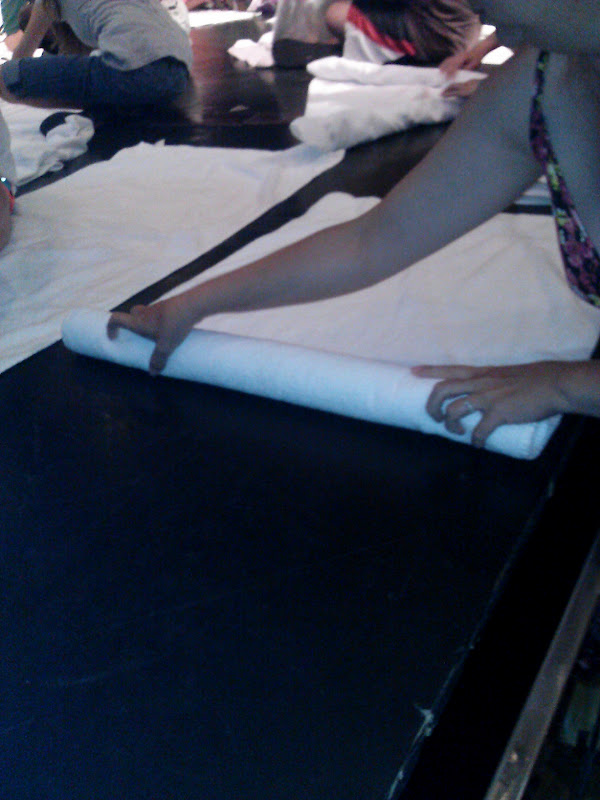
Next layer, now you wanna make sure that everything is stapled on good.  This is the clear plastic that is sold at the fabric stores.  It is pretty well sold at all of them, so you pick what is close or what you have a coupon for.  I got a medium weight, I knew that I would be dragging stuff across my work area and needed it to hold up.  That thin stuff...it will stretch and tear, just not worth having to re-do it later.


Before you lay that board down, you better check out your fabric.  It has been on the floor/table and you would surprised what all has grabbed onto the fabrics.  You can't see this??  Take a look at the next picture.


Chunks of fuzz, dirt, hair...get it off, ALL of it!!!  Once that plastic is stapled on there and you flip that board over, it is magnified!!!  Don't ask me how I know!!!  I put that spot at the back of my table and put something on top of it.


Alright, same process all over again.  Pull it all flat, fold up the long sides first and staple away.


Then, do the short ends.  Yeah, it starts to get a bit bulky here.


Oh drats...can you see where I circled it in the picture.  A chunk of fuzz down on the sided.  I am not pulling it apart, it won't really show once I get it all in place.


Wow!  Might not look like much in the picture, but this is great!  Can't wait to get it in the room and start using it!


Love the fabrics that I picked too.  I will put this one under the window that looks out to the backyard where all our birds gather.  I will do another one on the other side of the room for sewing, and use a different strip of fabric on it, something that reflects my love of sewing.  They will be great sharing the room because they will be the same base colors.


Here is the other one I did.  See how nice with all my sewing stuff.  Yes, that is stickers all over the sewing machine.  My daughter did most of those on there over 20 years ago, oh the memories, I had to leave them there! Surround yourself with what you need to do the job, but also include some fun stuff that you like.  I even put a measuring tape down the edge of my sewing one, just handy to have there.

Don't those filing cabinets look a sight.  The blue one was just purchased at a yard sale for $7.  I got a call from a friend that informed me that Dollar Tree just happened to have a peel and stick paper in wood grain.  Now, they both match.  I just measured and stuck it on, took two rolls.  Thank you for the call Linda, I really like the look.
Ok, I think this is enough for this week.  I will be back soon to show you what the cabinet looks like and why there are cabinets there instead of shelves. Oh, on the opposite wall, is the other table, is is on wire shelves that I got at Target.  They are sturdy and are holding file boxes of photos waiting to be organized.
Now I am finished.  See ya next time.  Feel free to leave me comments, I love hearing from you!!!!


Thursday, September 6, 2012

Part II of the Cruise

Well, here we go, just as promised.  The rest of the cruise pictures.


First stop was at Progreso.


This goes to show you the size of the ship.


A group that was with us on board, we bumped into them a couple of times.


Just us being all touristy!!!


Our ship, Carnival Triumph!


They told us going in that there wasn't a whole lot to do here unless we booked an excursion.  


This was the welcoming committee.  They would strum and sing a bit, and this stop everything and visit with each other.  The strumming and singing would still be going on.  They were faking the entire thing, that is the sound system behind them.  Too funny!!!


This dude fingerpaints the plates with oils...all except the palm tree and the ship, they are done with a liner.  We got a small plate for $10, he was asking $15.  I called him Picasso and he called me Matisse.  lol  Painting with him for a while could have been fun!!!


What there was to do was pretty fun!  You could hold a tiger for $10.


This monkey never left this guys arms.


Tossed the camera to another cruiser and asked her to shoot pictures.  We were both in for the $10.


The things that a husband will do for his wife!!!  I am telling ya, there is no end!


Our other stop was Cazumel.  And this stop is what I centered the cruise around.  A great friend of ours had said that swimming with the dolphins was just out of this world.  So, Darrell said that he would take me, this was the closest place that would actually let us in the water with them.  So...here we are at Cozumel!!!


Much more to do here, and all kinds of coupons to get freebies just for going into certain shops.


We had someone take this picture for us, it is for our Sarah who likes cows!


This is the view when you enter the pier.  So pretty, and I might have to do a painting of this one!


Lush greens with great backdrops!


We are thirty years older than when we got married, but just as in love if not more!!!


Dunno what to say about this one.  The guy was just standing in the walk area posing for pictures.


These are at the Dolphin Encounter!  There are several different places to go and several different packages.  It isn't cheap!  We paid about $100 each just to be in the water and have pictures taken, that didn't include us getting any of the pictures!  I will explain more at the end.


You could NOT bring your own camera, you could pay for a viewer to come and stand and watch, they had to be way up on the landing.  They could have a camera, don't know how much that ticket was or if they could even get good pictures from where they were.


You know I researched it before going in!  You haggle with them on the pictures!  Seriously, the pictures are $30 each and they put them on a CD.  Or, you can get the entire time on a CD for $120 but that doesn't include the "entire time", they leave off the kissing shots with the dolphins.


Was there any way to get all these pictures?  Yes, I told the guy it was our anniversary and that we had put our money into the trip and I guess we could get two pictures.  He said oh no... I can do anything you want of you on a CD for $120.  
Sold! Cha-ching!!!
People that had been in our group that we spoke to on the way back...paid the $30 each and got anywhere from two to eight shots.  One couple got the CD and didn't realize that the kissing dolphin pictures were not part of it.


One of our dolphins that we were with was pregnant.  They were all gentle and seemed to be well cared for!


Like all things in life, it is best to research as much as possible before you go or do certain things.  This was one of those times.  Our parents had given us money for our anniversary, and it paid for almost all the pictures that we got while on the cruise.  Pictures are so much better than just some trinkets sitting around to us, and that is where we chose to put the bucks.  I have already scrapbooked the trip and we enjoy looking back through it. 


Leaving our little dolphin paradise!


There is one more thing to share from the cruise.  Towel folding.  It was a free class that we took on board, I folded and Darrell shot pictures so that we could post them later.  
So, here we go!!! Towel folding 101


Large bath towel, laying out "taco" style...longways.


Mark center and roll in from both sides to that line.


Might be overkill on the pictures, but we had no idea how else to remember this.


Take it up against you and find middle and just fold it over.


Now reach down in each end and give a little pull, you wanna have little thingies sticking out.  Go a couple pics and I think that you will see what I mean.


Now, make sure that the folds are on your sides and grab all the little tab thingies that you pulled out....


And now, start pulling.  It is just a towel, pull.  IF you mess up, you start over!  lol


The teacher called this the "dead chicken" stage.


Lay it down with this side up.  It won't unravel or go anywhere, you have killed it by now.


Now, let's go on to the hand towel!


Fold in half, it's a taco fold, longways.


Be sure the fold is at the top.


Let's take the top corner and bring it down towards our elbow.  See the next picture.


Flatten it out good and do the same thing on the other side.


Tired of all these pictures yet??  I think my husband did a great job catching each and every step!!!


Straighten out the top point and just flatten it all out really well.


Grab that top point...


And, fold back a section, this will become the nose on the face. Smoosh it flat so that it will stay!


Here it is all tucked under nicely.


Take the outer edges and start rolling them in.


Keep going, all the way to the center!


Flip it over to face you.  Oh look, a little face!


Just start pulling on those ears, make them however you want!


IF you rolled it tight enough, you can yank around on here pretty good and it will stay together.  Now, go put it on the body!!!


How stinkin' cute is that!!!!


So, what did you think??  Take a cruise if you ever get the chance, my husband didn't think that he would like it.  We are not water people, and yet we are ready to go again!!!  Please feel free to leave me a comment, or even follow my posts.  This was a long posting and I have been busy, so I am not sure when I will be back, but I will be here before September is gone!