Heart of Texas at the Plano Centre, 2000 E. Spring Creek Pkwy., Plano 75074. Friday, Oct. 10 from 2-7pm, Saturday, Oct. 11 from 9-5pm, and Sunday, Oct. 12 hours are 11-4pm. This show charges $5 for entry, smaller show, but not overpowered by just jewelry, lots of different vendors. This is my FIRST year to show here and I will not have everything there, but should be fun!
JJPearce Pacesetter Holiday Bazaar at 1600 N. Coit Rd., Richardson, 75080. Saturday, Oct. 25, 9-5pm and Sunday, Oct. 26, 11-5pm. (I will be in the front cafeteria to the right of the fireplace).
Ryan High School at 5101 E. McKinney, Denton, 76208. Saturday, November 1 from 9:30-4pm. This show charges $1 for entry, it covers two gyms and an eating area.
Parker Women's Club will be set up at Victory Church at 6301 East Parker Road, Parker, 75002. Friday, Nov. 14 from 9-5pm, and Saturday, Nov. 15 from 9-4pm. (I should be right inside the large room to the left in the corner. I will bring all my paintings and have a carpeted wall to hang them on.)
United Methodist Women at the First United Methodist Church in Garland at 801 West Avenue B @ Glenbrook, Garland, 75040. Saturday, Nov. 8 from 8-3pm. (Smaller show and my last for the year, so IF I am gonna mark down any older inventory, it us generally done here.)
So now, you just gotta decide if you wanna see all the newest stuff, or everything old and new, or the sale item leftovers... or come to all the shows and see it ALL !!! lol... whatever you decide, please stop by and say "hi!".
Monday, October 6, 2014
Friday, September 26, 2014
Guest Post- a True Scrapbooking "Haul"
So... you will be able to tell from the start of this that I am not doing the blogging. My daughter is much more thorough in her "showing" of what is what. Even now, she is getting the original price to show along with what she has already done...she is just an all in kinda girl. I love it and it should be interesting to see how this turns out. Might have her do a bit more blogging more often, what say you?? Oh, and yes, we have our own organizational systems and we will use all this in time. So without further ado *drum roll here* this is how the ladies in my house shop:
Ever watched a craft supply "haul" video and wondered how people can afford to shop the way they do? Honestly, if it's more than $1.99, I probably won't get it. Even at 99 cents I've been known to put something down as just not enough bang for my buck. Here's how we do affordable scrapbook shopping.
Today, my mom and I went on the "tour of craft stores" that we do maybe once a month- the big (previously) two-story JoAnns, the newest Michaels, and the larger Hobby Lobby in DFW. They're kind of all in a row from where we live, so we just goof off and wander them all for good clearance steals. This time, we also discovered a warehouse sized Tuesday Mornings and a few smaller Tuesday Mornings along the same path. Usually we end up buying next to nothing, but every once in a while we find really good deals. Here's our damage from possibly the best run we've had in years.
Stop 1- JoAnns, where we both got teacher discount cards for an additional 15% our entire purchase.
Mom's Haul:
Basic Grey Page Flags- .96
Little Yellow Bicycle "Making the Grade" Tear-Out Ticket and Journaling Card Book- .96
7 Gypsies Tickets- .96
Sizzix Triplets "Banner" - 14.99 x 40% off- 8.99
Creative Imaginations Oceanside Stickers- .25
Creative Imaginations Life's Journey Stickers- .25
Total after 15% discount: $11.40


Me


Ever watched a craft supply "haul" video and wondered how people can afford to shop the way they do? Honestly, if it's more than $1.99, I probably won't get it. Even at 99 cents I've been known to put something down as just not enough bang for my buck. Here's how we do affordable scrapbook shopping.
Today, my mom and I went on the "tour of craft stores" that we do maybe once a month- the big (previously) two-story JoAnns, the newest Michaels, and the larger Hobby Lobby in DFW. They're kind of all in a row from where we live, so we just goof off and wander them all for good clearance steals. This time, we also discovered a warehouse sized Tuesday Mornings and a few smaller Tuesday Mornings along the same path. Usually we end up buying next to nothing, but every once in a while we find really good deals. Here's our damage from possibly the best run we've had in years.
Stop 1- JoAnns, where we both got teacher discount cards for an additional 15% our entire purchase.
Mom's Haul:
Basic Grey Page Flags- .96
Little Yellow Bicycle "Making the Grade" Tear-Out Ticket and Journaling Card Book- .96
7 Gypsies Tickets- .96
Sizzix Triplets "Banner" - 14.99 x 40% off- 8.99
Creative Imaginations Oceanside Stickers- .25
Creative Imaginations Life's Journey Stickers- .25
Total after 15% discount: $11.40
My Haul:
Mosaic Thickers in Metal- .50
Mosaic Thickers in Light Pink- .50
Prima Say it in Crystals Hexagons- .50 x2
Basic Grey Page Flags- .96
Basic Grey "Hey Girl" Die-Cut Shapes- .96
Total after 15% discount- $3.61
Stop 2- Tuesday Morning
Disappoint. Mom got one stamp marked .49 at 20% off, so it was .42. Woohoo. (I already had these stamps, I think she was feeling some envy.)
Stop 3- Tuesday Morning Warehouse
Whooooa this place was big. I might have had a freak out in the parking lot. It was really interesting, but extremely disappointing by the lack of organization in the store. I found myself lacking the will to dig through their stuff and we almost left empty handed (except a completely unrelated children's Christmas gift). On the way to check out, we spotted the 80% off clearance bins. Jackpot!
Mom's Haul-
Opalite Archival Shimmer Ink in Cypress Frost- .59
Versa Magic Archival Ink in Sierra Vista- .59
Total: $1.27
My Haul-
Opalite Archival Shimmer Ink in Cypress Frost- .59
Autumn Leaves Clear Stamps by Rhonna Farrer Love- .03
Total: $0.67
Stop 4- the "new" Michaels
We were super disappointed here until we found a score on the clearance aisle. I've been really wanting some colored embossing powder, but obviously, I'm super cheap. Colored powders (and I want bright or neon) are usually about $3 a bottle, or in a pack of three to five (with an ugly color!) for $10. We found the Recollections Detail Embossing Powder in Neon for $3.49. Yes, I doubled the cost of my thus far purchases on embossing powder. But I needed it! Tax brought me up to $3.77
Stop 5- the "big" Hobby Lobby
Mom's Haul-
Little Yellow Bicycle Handwritten Love Journaling Stickers in Travel- .64
Chic Tags Journaling Tags in Birthday Cake- .60
Bo Bunny Note Worthy Die-Cuts in Prairie Chic- 1.43
Jenni Bowlin Identify General Mini Deck- .64
Echo Park Paper Co Memos in "For the Record"- .90
Total with tax- $4.56
My Haul-
Pebbles Phrase Stickers in Lake- 1.07
Bo Bunny Noteworthy Die-Cuts in "Family is Noteworthy"- 1.43
Total with tax- $2.71
Stop 6- Tuesday Mornings on the way home
At this point we were tired, and we grabbed one paper pack off the clearance rack to split. It was WeRMemoryKeepers For the Record in "Documented." With a 20% off and tax, it was $0.85.
Mom's Total- $18.08 including tax (and remember, she bought a Sizzix Die-Cut for $7.60!)
My Total- $11.18 including tax
And for those who are curious, without the discounts Mom would have come out at $54.96 and I would have been at $50.97. I personally believe that means I got a better deal since mine was worth more if we don't count the Sizzix. Heh. Though without the discounts we would have just window shopped and spent nothing, we were literally seduced by clearance and never even got to bust out our coupons.
This is how WE haul.
-Sarah
COMPLETE HAUL PHOTOS
Mom
Me
Sunday, September 14, 2014
Master Bath Redo
Well, it was time to redo the sink, just rip it out and replace it. Shouldn't be too difficult, all I had to do was to cut the caulk from the walls and cabinet and get it out of there. Get the new one and put down the caulk and slip it in. What could be so difficult about that... well, let me tell you!!! I have found that very few "house or room projects" are ever as easy as they first appear to be. Grab a cup of coffee real quick while these photos load, this is a good one!


Check out how the top is connected, there is caulk everywhere. All that caulk has to be cut through, you don't have to peel it out, just cut all the way through it with a good sharp exacto or other blade. Yes, I should have cleaned it up a bit before taking pictures, but where is the fun in that? THIS is REAL life folks!!! Oh, the clock being on the side of the cabinet? We can see it from the toilet, shower and tub. IF we had hung it on the wall over by the switch, it was only visible from the sink area. So, we did what worked for us. When it was hung after the redo... I used a 3M strip so that it didn't do any damage to the cabinet.
The sink bowls. My side isn't too bad, no stopper and some rust was happening around the drain area. The other side, cracking, splitting and peeling was getting rather bad. There was no way to use one of those kits to just repair it. Again, I did my homework.
Remember to look all around at how it is connected. There were screw down underneath, and they had to be unscrewed in the long run. Keep going, you will see in a bit.
Now, I should mention here, that I do NOT usually pull apart a project before purchasing all the stuff for said project. This was no different, I did my homework. They don't make counters as long as ours, it would be a special order. Who wants to pay extra for a nice counter to put on the old worn out and dated cabinet? Not me. I could have just painted it, but then, I still had to put out extra for those supplies and the new counter.
So... off to the store to get the best cabinet and counter to fit the space, at a price that we could live with. Now, there is the catch... prices. I got a quote from someone to just pull the sink and do the plumbing for me... over $800. No thanx, how hard can this be?
lol... Trust me, it would have been more than that by the end, if he had even done what needed doing. But, "hard"? Not really, just time consuming!
After several trips to ALL the hardware, furniture, fixture, home decor stores that were anywhere close to our house, we ended up with IKEA. Now, stay with me, I know some of you are like... no way, this lady is crazy! But, it really was the best for our area that we had. The space was too long for anything pre-made. We were also looking at moving to a king size bed and headboard... so, yeppers, got it ALL there! We love the bed! Bookcase going up the side, two drawers under each side, mattress and no box spring, a footboard and great nights sleep!
High up on my list was a sink with a backsplash! Face it, I have a man in the house and they are not always the neatest. Water splashes enough when we are careful, this backsplash was gonna save me cleaning that huge wall mirror so much. Below, the sink faucet was on clearance, and I loved the look of it.
At IKEA, it is a one shop stop and they deliver for one set fee, no matter how many boxes. I should have taken a picture of the front room after delivery.
Two sinks/counter, two cabinets that had to be built and each one was two boxes, two faucets, and then the bed came in four or five boxes, oh and the mattress. We had boxes everywhere! Looking back, it was so worth it!!!
Look down under the sink and turn off the water, all of these! I had four, two hot and two cold as it was a double sink. I also had to turn it off at the street as I was going to replace the on/off part at the wall... you can see it is pretty nasty and easy to do while it doesn't have a cabinet to work around. There is a tool that will cut right through the copper piping and the new valves just snap on, no more torch or sweating them on. Yes, it really was that easy!!!
Undo the pipes before you try to take out your sink. Be sure to put a bucket or towels down to catch all the water that was trapped in the curvy part of the pipes, cause it is nasty and will pour out all over the place. Yes, I had an old bucket down there, no problem. All the pipe replacement that I talked about was done after the cabinet was pulled out.
This was it! The above picture!!! This is what threw me for a loop! The mirror was actually resting on the counter. We couldn't pull out the counter without taking down the "wall to wall" mirror! All I can do at this point is describe to you what happened. Oh how I wish I had pictures, but that would not be fair to the person (my hubby) that was helping me with the sink. We start to pull out the sink, and it won't budge. Is the caulk loosened everywhere? Yes. Are you sure? Yes. What did you miss? NOTHING! Dang it, the mirror is holding it down. Wiggle as it would, we couldn't get it high enough to clear the sink bowls over the top of the cabinet. **insert pouty face here** We take the clips off the wall that are holding up the mirror and pray that it isn't glued up as well. It isn't!!! It comes right down, heavy, but down and out of the way. I am happy to report that the mirror was given away to someone who can use it in their bath remodel. So now then, the sink. Ahhh, it really was loose all around and lifted right out. OMGosh!!!! That is so heavy. So, as it sat balanced on the cabinet, I asked hubby if he was ok with it for a minute. As he said yes, I was running for the front door and came back in a matter of minutes with Jose from next door. He bench presses 450 and has lived next door with his folks for several years. There is something to be said about knowing your neighbors! I can flying back in with him and my hubby just started laughing. Jose already knew what was going on and was more than happy to help. We put it on the dolly and barely got it around the brand new king bed with white bedding. Nothing got dirty or dinged up! It went out to the curb! Thank you, Jose Jr.!!! Within a hour, someone was out there taking the faucets off for the metal, good riddance! After that, I got the cabinet and drawers out by myself without any problems.
Surprise!!! Now why on earth would they leave that open space in the wall? Did someone tell the builder... "oh, let's just see if we can make it hard for someone to put in a new cabinet one day"? I mean, really? When you do a job, do it right. So, off to the hardware store. I should just tell you at this point that the folks at Home Depot pretty much know me! They don't sell a strip of wood that will fill that gap. Too thick or too wide. I cold purchase an entire sheet of sheet rock and cut the strip then do the seam fix and float after that. Sorry, not going to happen. I did some talking back and forth with the guy there and this was my idea and he said that he had never heard of such, but that it would work. Sure was a lot cheaper than what I thought it was gonna be!
Hey, don't laugh, it worked! These also work around doors for molding or on the front of a shelf as a lip so that things have a ledge to keep stuff from bumping off. I keep several on hand now!
I already had that yellow mesh sticky tape. I didn't have the mud to float, so I used spackling compound and it worked just fine. You tell me at the end if you can even see any of this! I put on a couple of coats and then did the spray texture on this when I did the rest of the wall. Oh yeah, the walls... here is another good laugh for you. The room is vaulted and wallpapered. There was no wallpaper behind that mirror. Hubby thought that it would be great to put up some framed mirrors and just take down all the paper in the bathroom and paint. Of course that meant that I had to strip the vaulted areas, texture all of it, air out the room... the entire house!!! and then paint. The room isn't that large, but it took almost three cans of spray to cover the area. No big deal... lol. Took a couple of days to get all that finished. Oh yes, this two day job of just taking out a sink turned into a two week job for "me".
Not all the photos will show the paint color very well, it is a soft blue... kinda like a calm ocean feel. But, hubby didn't really wanna theme the bathroom, so let's just say it is a soft blue. Also, I didn't texture the back wall that is in that recess of the cubby area. In fact, I had to put the ladder in the tub, stand on the top and lay in the area to even reach it. Part of the time, the brush was duct taped onto a dowel to reach the area. But, I can breathe easy now, it is finished and we like it and it will forever be this color!
Below... did I mention that the hubby thought that it might be a great time to replace that old ugly multi bulb light fixture? No problem, I have never done electrical before, but how hard can it be? Turn off the breaker and just match up the right colors...right? Exactly right! Was no problem!
I have laid a good number of peel and stick floors in my time and I love the look. They have come a long way in the past few years. I have a great dislike for carpet when a spill on the floor is so hard to scrub out of the carpet and so easy with a washrag that just goes into the dirty clothes. Yes, I keep rags on hand for this, saves on the purchasing of paper towels. Anyway, back to the floors... part of the reason for the soft blue walls was cause of the floor color. I ALWAYS keep extra tiles hid away for a room when I tile, ya just never know when you may need them. My daughter dropped a bottle of nail polish remover in her bathroom once and the tiles just curled and popped up. Easy replacement. So, I went and dug out my tiles. The new cabinet bases are on legs, so all that area under where the old one was needed to be covered. Oopps... three tiles short. Off to Home Depot. Nope, discontinued. That is ok, I will just put something under the very back that is close to the same, it isn't seen unless you get down on the floor and look under the cabinet. No big deal. Guess again!!! I get home and the huge window in the bathroom had faded the tiles, the ones that I had stored were like an entire different color. Well, my sister enjoyed getting my back up tiles, she can use them out there where they live to line some old cabinet bottoms. "Hey, sweetie, we need to redo the bathroom floor. You free tonight to go shopping after work?"
I think this is called sandbar and was from Lowes? Anyway, it sure makes the non-themed bathroom look more beachy!
Here's the plumbing all finished up. The hoses for the water were not long enough, so we went out and got extenders. These were the shortest ones they made that fit what we were doing. I have to admit that IKEA's pipes are crazy! It is plastic and not by American measurements... so if you have to go to the hardware store to get anything, take ALL the connecting pieces with you! Anyway, it was finished and we had running water. The cabinets got bolted to the wall and then the caulk went on the sinks/counters and they got put into place. Because it was IKEA, I had to build both cabinets and the drawers. Really not difficult, just takes time.
Oh SNAP!!! The drawers won't close. As close as I got the plumbing to the wall, and I couldn't have gotten it much closer, it wasn't gonna work. Oh, but YES, IT WAS! I took the drawers and cut into the backs. You might cringe. Brand new cabinets! Oh heck, it doesn't show and I really don't know that there was anything I could really do to fix it. Didn't hurt our use of the drawers and it was a super easy fix.
Everything in the drawers are in baskets, so it really didn't matter. I am still glad that I just cut them!
Drum Roll, please....
I went ahead and textured and painted the medicine cabinet to help it blend in. It was the same wood as the prior cabinet. Like the new lights, they can be angled to spots over the sinks. We each have a mirror and they stay clean! On the backside of that wall is the toilet area and towel storage.
This is the wall across from the sinks and mirrors. I found some fabric that hubby liked with boats on it for our "non themed" bathroom. I whipped out some curtains in a matter of minutes. Oh, new bathmats and towels. He found these with starfish on them from Kohls. Don't ask me how many stores we went to before settling on these!!!
Here is the last picture. The cabinets and then the tub with my painting. Did you catch my blog about our trip to Chicago? Do you remember us on the Tall Ship Windy getting a tour from the coast. We fell in love with that ship and just the entire experience. Hubby wanted me to do a painting of it and the lighthouse that we went past. So, it had to have a place to hang. Hey dear, why not paint it and put it in the bathroom... they ya go, Beach Themed! lol. It did all come together, and we love it. So peaceful and relaxing. For as much as I give him a hard time... my husband is the BEST!!! He IS my best friend and spoils me rotten! Thanx to Darrell for hanging in there with me through all my quirky projects!
So, it started with a sink, then exploded into this. I would never have just attacked all this at once. At our age, it is harder and harder to do all the reaching and stretching around in tight spaces and up high. Because it evolved a bit at a time, it was obtainable. God won't give you more than he knows you are capable. Keep on keeping on!
See ya in a few weeks!
Oh, anyone interested in seeing pictures and out experiences at the Sandwich Pocket Theater?
Monday, August 25, 2014
Bishop Arts District in Dallas, Texas
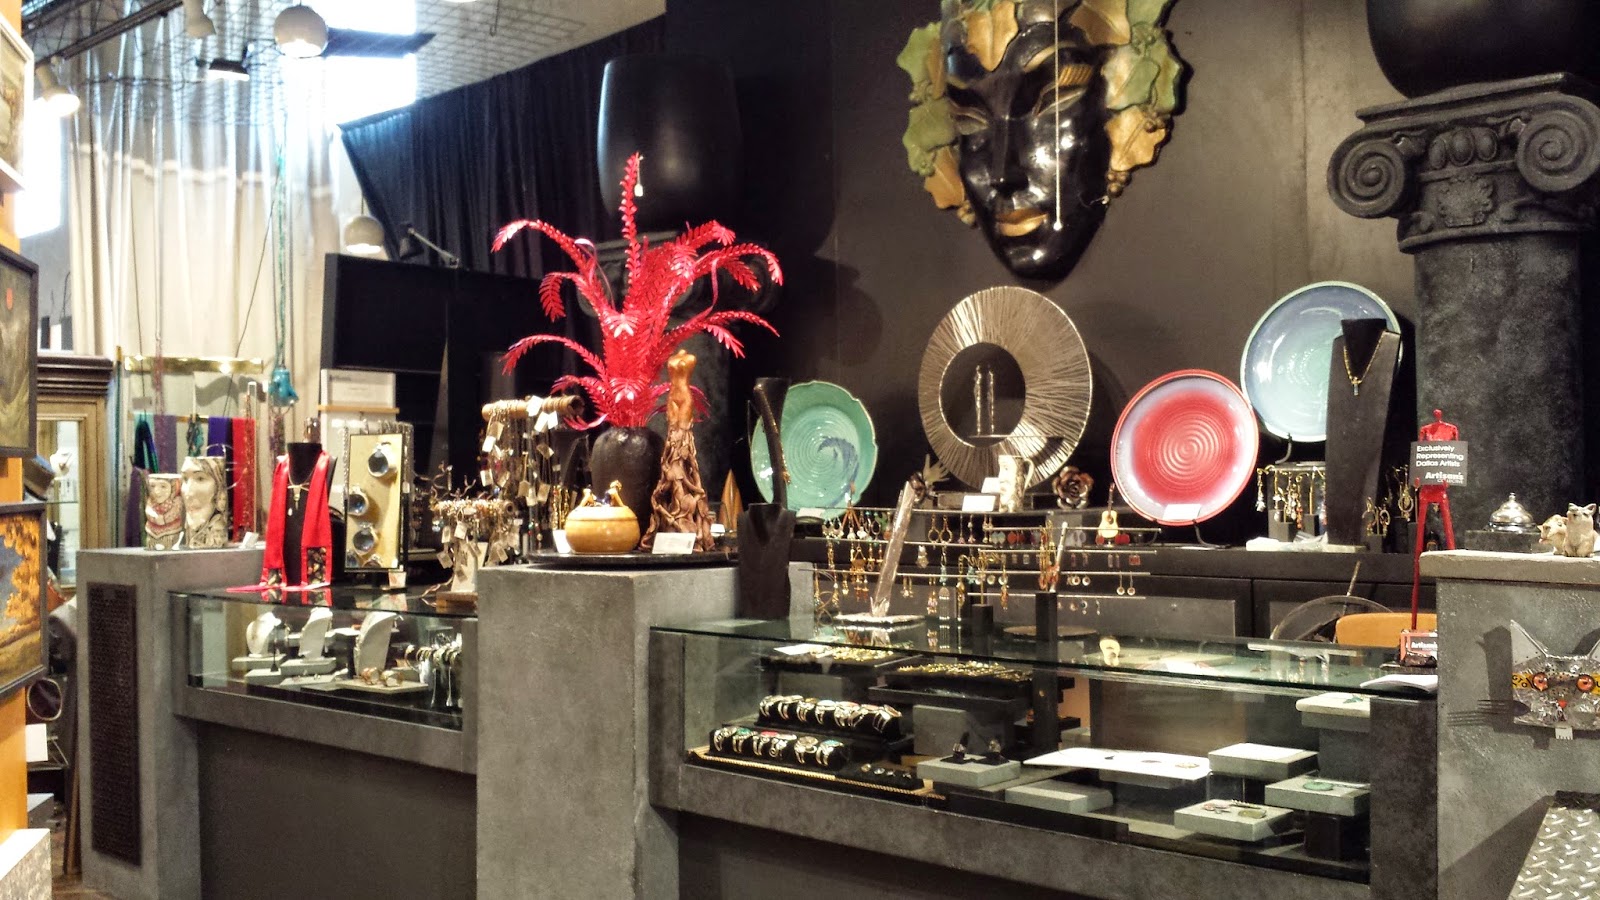
My husband has lived in the Dallas area ALL his life! He recently took me back to the Bishop Arts District. What a blast!!! I could not believe all the really cool shops in the area. Where have I been? What is this? The best kept little secret around!!! The folks are nice, the shops are clean, and some of the prices are really good! So, you know me, lots of pictures....


.jpg)


We got the Lemon "something or other" and it was SOOooooo great!!!!
Yep... there is a different name on over the entry, they just changed it.
This is just ONE of the MANY displays. IF you have never shopped in a "fare trade" store before, you are in for a treat!!!
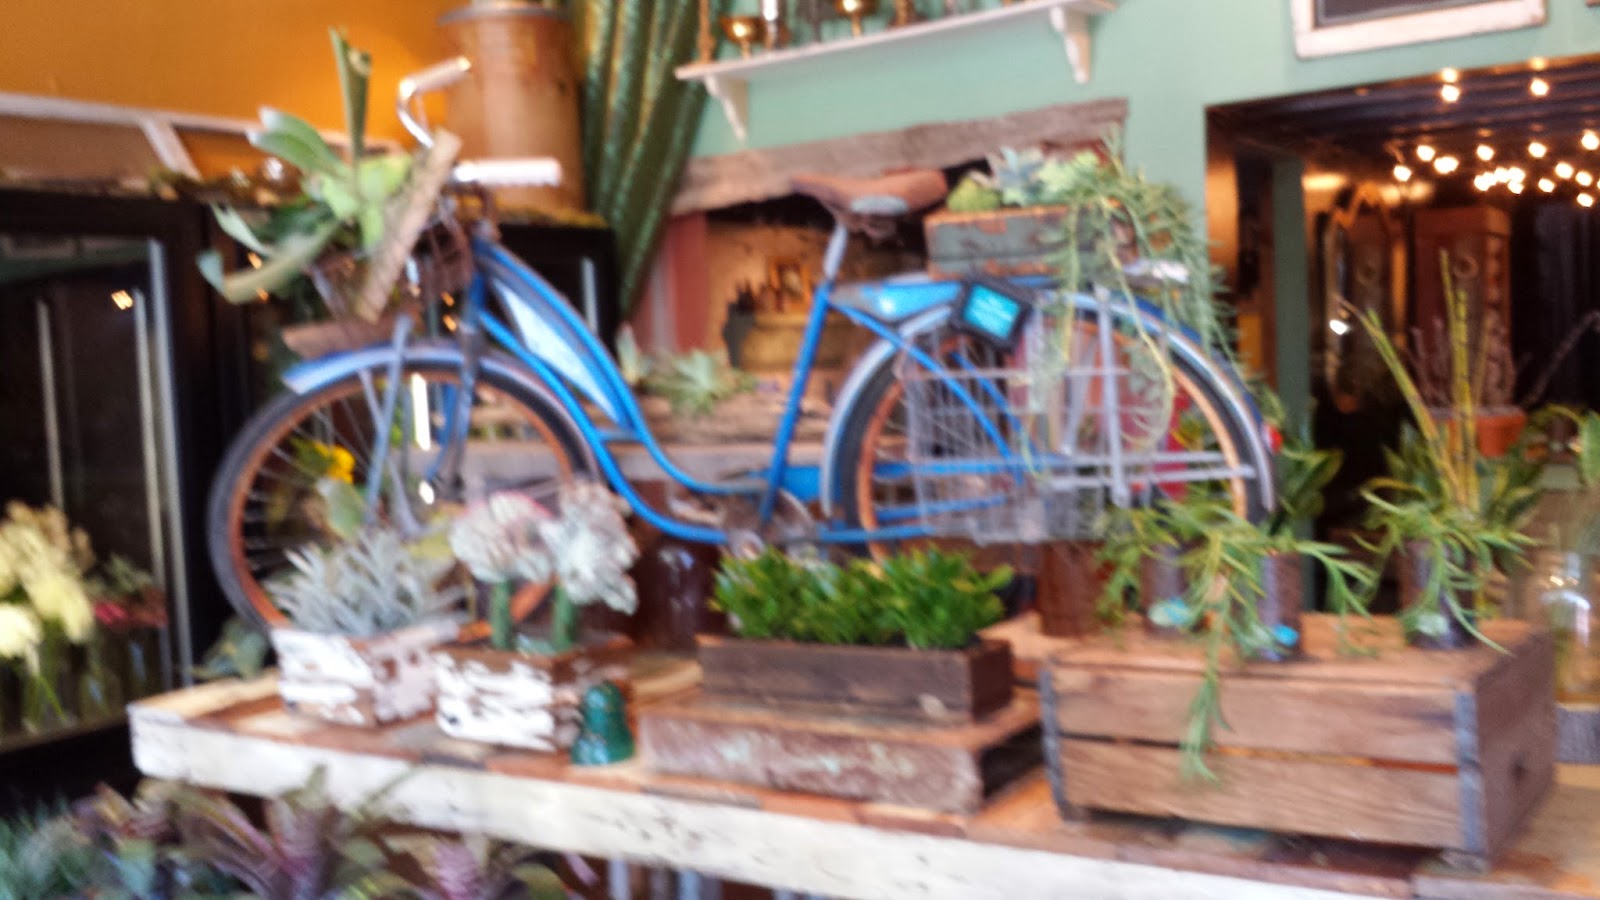
They sell fresh flowers right from the case... or you can make an appointment to meet and plan your special occasion in this really neat room (below).
Hopefully, someone from this place will post... They are really into giving back to the community!
SOoooo.... IF you find yourself with some time on your hands, get on over to the Bishop Arts District and be sure to tell them that Tinkartist.blogspot sent you. I am sure that they have no idea who I am and won't remember me from the next customer. BUT, we really did have lots of fun. I only took pictures and highlighted a few of the shops. The fun is door to door, take the time to go see what it is all about.
Most of these places are small businesses, they are local and need our support! I am small business, so I know what they are up against. Take some time out of your busy month and head on over there. It is a great little drive and some nice scenery.
I will see you back in a couple of weeks when I will show you my master bath makeover. The plan was to replace the double sink. No plan ever stays as small as we plan, and this got way involved!
-Pam
Subscribe to:
Posts (Atom)