

Can we say Termite Damage? It was showing through the "fruity" paper, and starting to buckle and peel even though they had been gone for quite some time.


This is a great before and after shot! You can now see why I just could not reach any further. The cabinets jutted out and then the counter under that. I didn't wanna lean a tall ladder up against the wall, in fear of what kind of damage might be under the wall. I also wanted to lighten up the weight of cabinets on the left in case of damage that would pull them from the wall...you will see later what I did with the glasses and heavier stuff that was in the end cabinet.


Not being able to reach caused me to get very creative in my thinking. I stood on the second to the top step and preceded to paint over all the fruit. Then, with a roller on a pole, I did a second coat of the "Gripper" and went over all of it.


Pretty cool, hu? Let it dry overnight and come back at it the next day with paint. The paint was the same brown that I had used before. I don't think that I mentioned that there is sand in the paint. Yes, sand. I went to the Home Depot and bought my paint and a product called "Sand" that you add to your paint in a large bucket and stir up. Do it outside on a not so windy day, harmful to breathe this stuff. It gave me a texture that I could not have gotten otherwise. You should apply with a roller following the manufacturers directions. I did not! I used a large paintbrush and put if on by hand...the reason for this is cause I knew that I could not reach the high parts and get the application on as it said to.

When not in use, put your brush(s)in a ziploc to keep it moist...I do this instead of washing them. I do not like the clean up stage at all!!!

You can see how brutal I am on brushes, but, believe it or not...they looked almost like new after I cleaned and conditioned them!

You can see here how I taped my brushes to long garden stakes so that I could reach up to the top and get the edges of the wall where it meets the ceiling. Take your time and do what you need to, get the job finished the best you can and make it look great!

Here is the area that used to hold a rather large microwave. Wow, those are some holes!

Here is a close up of one of the holes...

I filled them with more of that same compound that I used to fix the termite tunnels.

I used my fingers to try to give it some texture. I also tried to quick dry the areas with a heat embossing gun. Don't try that, it takes forever and really didn't make a dent. So, I just walked away, will check on it later after posting.

Here is another close up. The area will crack and shrink up a bit when dry. I will most likely have to put on another layer, blend a bit, let dry again, and then paint.
Moving on to the pantry...

Love this wallpaper that I found at Home Depot!! It is paintable!

You can see here how it looks. It started out rough, but with just a few swipes...I love it. So glad I bought this.

The uses that are rolling around in my head!

I used a damp sponge and wiped it off on the edge of the plastic tray. Then, went to the paper and "very" lightly and in circular motions applied it to the paper.

Back in the pantry, I painted my new teal color and the support bars in white. In fact, I did the support bars and bottoms of shelves with the "Gripper". That covered it all, didn't even need to use the white paint.

Pretty just like this, but wait til you see the pantry with the shelf liner in it!

Remember the pantry that I so loved, it was all clean. Take a look at it now...
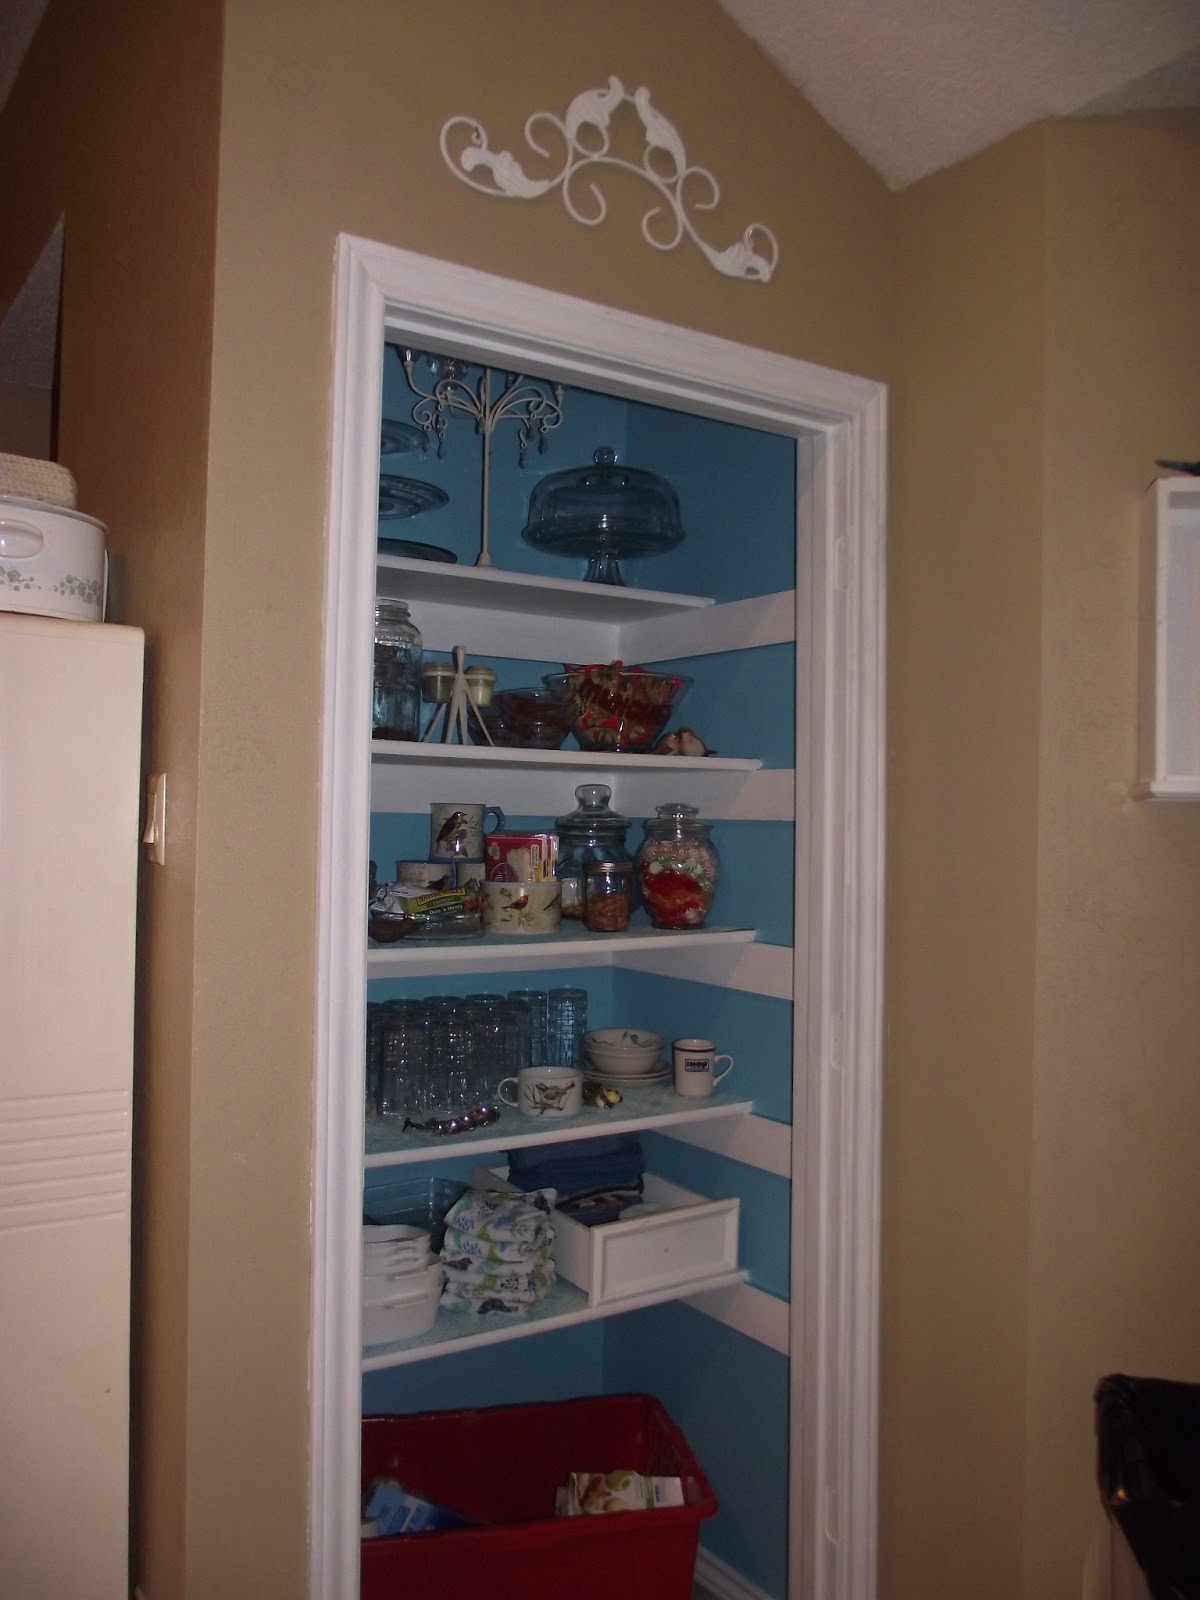
I like it so much that I took off the door. The blue Tupperware Modular Mates were not going to look good with the teal...so, the pantry had to be changed. I wanted my teal!!! So, I took everything out and put in what was pretty and shiny! And, don't worry, that recycling tub won't stay there!!! I will use something pretty and then dump it into the tub out in the garage. Oh, see that drawer in there on the bottom shelf? It holds towels and has the decorative paper in it. The paper is also on all the shelves.

Here is another view of that drawer! Left the roller on the back so that I could pull it out easier if I needed to.

Does this picture have you puzzled?? It is not in the wrong place. The kitchen is correct! Keep reading!

The clear gooey stuff is E6000. Great stuff! Might should have used wood screws, but we will see if this is enough over time.

Then, I pushed the metal rolling wheels down into the glue and left it to dry overnight.

The next day...all dry. Ready to flip the bookshelf back right side up.

I just happen to have enough space between my fridge and the wall for this pc to slide in and out with ease. Talk about blessings. I put out about $10 on wheels for a bookcase that I already had and vala!!

Just how cool is this!!! Cheap than the ones I saw pinned on pinterest!!!
Not finished yet...stick with me, there is more.

Candle holder that I am going to transform to put up on the ledge over the dining area...also seen from the kitchen.

These metal prong thingies all have to be put down.

Again, I am transforming things that I have laying around to make my accessories!

This is a puzzle bird house that was hanging in the laundry room.

See, 3D puzzle!

Another smaller birdhouse that I had gotten from Hobby Lobby.

Greenery from the floral box out of my art/craft room closet is just what I needed to decorate the rest of this.

Oh, and one of my favorite blue jays!

How about that? I really like the way it turn out. It is just like what I had in my mind! I like how the hanging jewels are sparkling off the wall.

Here is a view of the entire area. I finished it off with my painting of the birds that I did a few years ago. Ready to see the rest of the kitchen??

Brought in my grandmother's "tin safe" that has been in the garage for a couple of years. My mom gifted me this a while back and I just wasn't sure where to put it yet. I peeled out the contact paper and lined the shelves with the same painted wallpaper that I used in the pantry.
Let's continue around the kitchen.

There is a small wall between the pantry and the door. You can bet on it that it won't stay that empty!!! I put another "freebie" drawer up there. See that same wallpaper again, only this time I did not paint it. I just put in some craft glue along the outer edges to hold the paper in place. I also did not glue down the paper in the pantry. After having to peel that wallpaper off the walls, I didn't wanna glue anything down!
The Tupperware and some other kitchen items. Now you see it...

...Now you don't! The wheels were such a winner!!
You can bet that I will find something to hang up here...just not sure what to put there just yet.

Moving on around to the right... yes, I know that I have to paint over those filled holes over the stove. And, while they were down, I washed all the grime from kitchen grease off the cookie jars. Let's keep going...

I made a coffee station, hung up a sign that I had painted with our family name on it, and then finished it off with a "bird" themed lamp on the counter.
Ok...so was that too much for one blog?? Hope you like my kitchen. It works great for us. I know that a pantry without a door isn't for everyone, but it works for us right now. I am constantly painting, so I have no doubt that something will come up that can be done to hang over the fridge. Please, leave me some comments here...let me know what you like, what you might incorporate into your own kitchen, and if you have any additional thought of what I could add or change. Thanx and see ya in a couple weeks.