
This is what my dining room looked like before, not bad, but you also are not seeing the carpet up close!
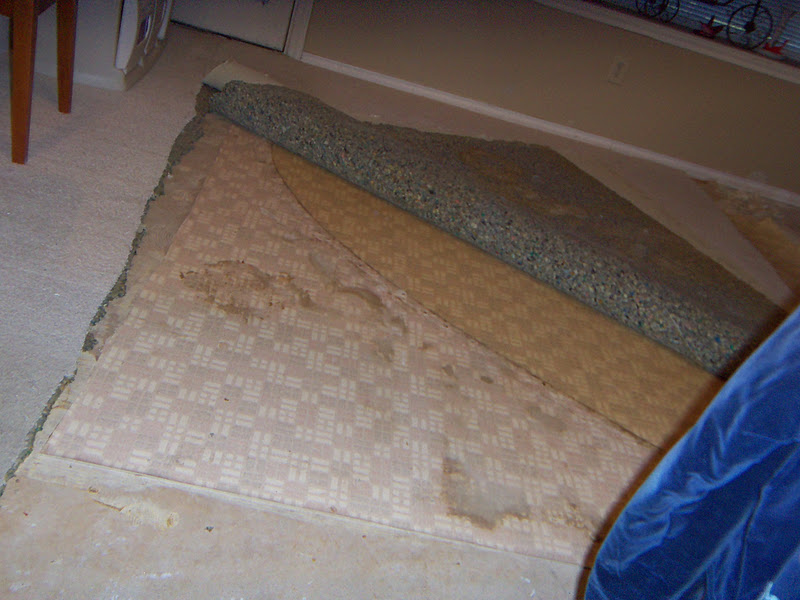
Ripping up the carpet in strips and what did I find underneath but linoleum. So, I got to yank that up too! Of course they had nails holding it down. so that meant more nails to pull up and more holes to fill later.

And, the backing from the old floor was glued down, so I had to peel it up.

I have blogged before about this Dawn Power Dissolver, and here I am using it again. Water soaking the paper backing was just not doing the trick. But spray this Dawn and wait five minutes, came right up. Then, I just had to wet mop the chemical up.

That mess in the center, is all the backing paper that I got off the floor. Into the trash can it goes! Oh, let me insert a comment here real quick... Put ALL the tack strips and nails into a trash bag and then into your trash can. If the city dumps that can and some lose nail falls out, you know it is YOUR tire that it will find. Save yourself some time and money and just trash bag everything. Now, my city does a front pick up every week, so the carpet and pad all went out there. Ok, let's keep going.

See all those little white dots on the front left of the photo? That is where they had nails before, so they had to be filled.

Failure to fill ALL holes means that your new flooring can dip down into those areas and crack over time. Again, save yourself some time and money and just fill them now.
They are filled, sanded, and then the entire floor gets another wet mopping to get everything up! Then, before I lay each tile, I brush the area off with my hand. Be sure to lotion your hands later, the brushing over the concrete will dry them out. Oh, just to let you know, I am doing the same peel and stick tiles that I did in the art room a few months ago. This room and that room do meet up and it makes a nice flow now. I still have a small hall and the kitchen to go, and then it will all be finished and look much larger!!!

I bought these to go on the bottom of the table legs and the bottoms of the chair legs. The package on the right is just some peel and stick pads, and that works fine for the table. Those pads are not so great for chairs, they start to slide around and fall off over time. I like the ones on the left for chairs, just hammer them in and they are fabric bottoms. Everything now glides across the floor instead of scraping!

Doesn't that table look small on my new floor? Love it!!!! And the rooms just flow together with the floors all matching. Spills are so much easier than with that old carpet.

I have to say that I am very pleased with the results! I am keeping an extra case of these tiles in case I should have to replace tiles down the road. One case for three rooms and a hall should be enough. I started with 21 cases, so I think I better get off here and go get the hall done. See ya in a couple of weeks!!!
No comments:
Post a Comment