You know by now that I am a visual, so there is gonna be a ton of pictures! IF something isn't clear, or I left out a step... please leave comments so that I can go back in and correct it.
Go grab you a snack while all these pictures download!
First of all... I seldom pay full price for any of my crafting needs... or wants! All prices will be full price, before sales or coupons... I will post where I got the items, but I would think that you could get them at other stores.

This is floral wire in long stem form, don't get the roll, it isn't the right weight and all. I went with the 20 gauge in silver. You get like ... 30 pcs for $1.99 at Michaels. I don't think they carry it in silver at Hobby Lobby.

All my tools were in my "jewelry" making supplies. I got them in a bundle pack from Michaels, years ago. I have replaced by wire cutters several times as I am brutal with them.

Just grab the wire at the end, start turning...

When you get to a certain point, you will have to start turning back the other way. Just slide the wire off, flip it around and go for it. It is just wire, you have a ton of it, you can start over if need be. Oh, also... if you have arthritis... see if someone will do this for you. There are lots of folks that use jump rings for this step. I didn't for one main reason... ease! I need to be able to take these on and off and add in new babies as they are born. I don't wanna have to take it off the wall each time and mess with little metal rings. So much easier to just unhook, add in the new one and then hook it back up.

After you have the above shape, slide the wire off. It will not be perfectly flat and not perfectly shaped... not to worry.

Get your wire cutters and clip it off. Be careful... it will shoot across the room if you are not watching what you are doing. I more or less just held it in one hand and bent the long piece back and forth a couple times... it snapped right off.


Yep... that is what I ended up with.

Go ahead and do a bunch of them. Then, see below ... just put it the round tool and flatten it... won't take long to get them all pretty flat.

IF you are purchasing these or the jump rings... be sure to make sure that they are going to fit the holes of your "tags" with the names and dates.

Got these to screw into the bottom of sign to attach all my "tags" to. They are tiny... only 12mm and cost only $1.99 I was at Hobby Lobby and saw these over with hanging stuff.... you might have to pop this picture up on your phone and ask them to help you find them.

I got these at Hobby Lobby for $3.99. I got the ones that do not have a hole in the top. I have seen them at Micheals with a hole in them, but it was a pretty big hole.
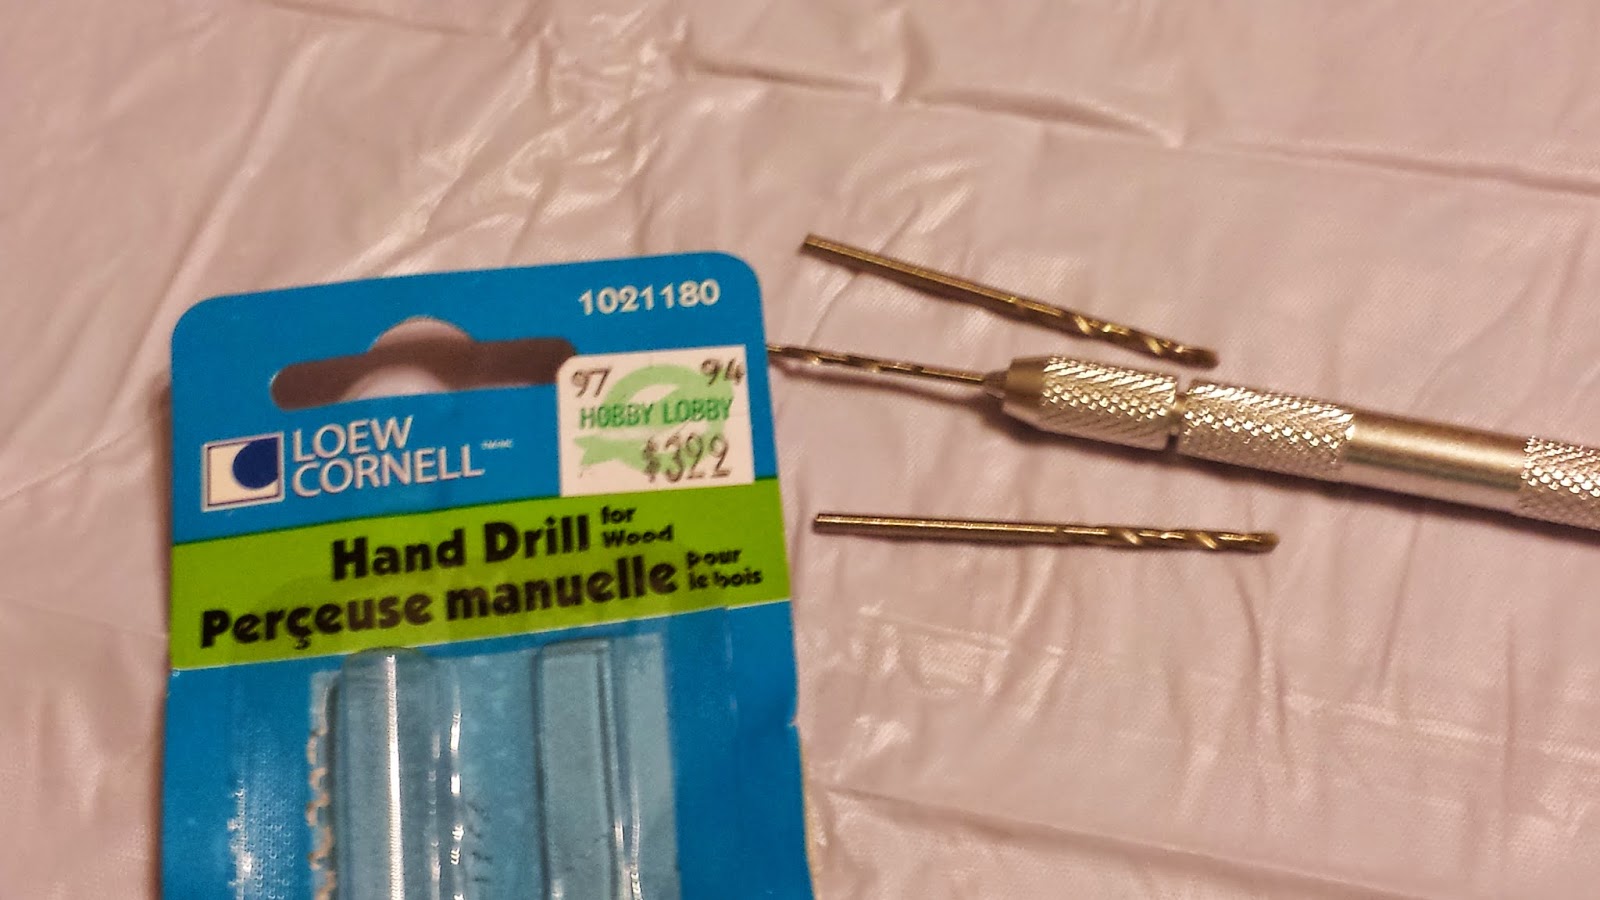
Yeppers... Hobby Lobby for $3.99 for a small hand drill. Just put it together and start turning. When you get to a certain point, it jams up and the bit falls out... every time... no matter how tight I put it in! It got returned and I drug out the large drill and was finished in a number of minutes. I also bought a second bag of the disc circles... I am including my sister's family on this and they are a clan all by themselves! lol

Whoa.... back up, put on the brakes... I forgot to tell you bout my circle that I drew. It's like a little cheat sheet so to speak.

Get a scrap of paper out of the trash and draw around your disc. Cut it out...


Fold it in half and put a hole in both ends. Now, lay that on your discs and mark for the drilling holes. Don't try to guess what is half way and then have discs that hang lop sided!
.jpg)

Be sure to drill over a drop cloth, damp paper towel or something. There will be quite a bit of sawdust.

I used masking tape cause it was near by. I fold under the ends and tape it to the table... in my case it was a Dollar Tree shower curtain. I get these and the plastic table cloths (thinner) all the time for crafting on. Then, just stick all the discs down on there.


You can whip through getting one side all painted in no time. When I peel them up, I get some paint on my fingers and touch up anything that got missed around the outside.

Then just lay them on the table to dry... see below how one stuck... no big deal, peel it up and keep going.

I used paint that I had on hand that matches my kitchen, it is hanging around the corner from the kitchen. Grease and moisture in the kitchen is why I didn't just make scrapbooking tags. I wanted to do those with each person's picture, but it just wasn't practical.

After you are sure that side one is dry, flip them all over and do side two.

This is where I say ... do as I say and not as I do... Do these first, they and the canvas can be drying while you are bending the floral wires into hooks. Me... I got nothing better to do than to watch paint dry, so I did the bending first. lol.... I took a break and had some lunch then came back to finish it up.
Oh.... also, I would do the drilling after you paint so that you don't have to poke anything through your holes to get the paint out.

The day that I decided to do this... Michaels had their black two pack of canvas on sale. It is 12x24 so I knew that would give me the space across the bottom for the discs for all 12 months. I was going to paint it "sunflower" and then changed my mind to the torquoise. What I do ... don't paint the entire canvas, just paint where the words are going to be! Then, I used the sizzix or cricut to cut out my letters from contact paper. After watching the paint dry... I stick down the letters and paint over the top of the area with black paint. Sorry, no pictures. While it is still wet!!!! I get a straight pin and lift the corners of the letters and peel them off. Ta-da... when lifted, the words are in turquoise cause that was the color underneath. I guess I may need to do a posting on this... do you understand what I am saying? So, whatever color you want your letters... paint that color first! Then, stick down the letters and paint your background color over the top. So, because I had a black canvas, I only had to paint the word area black. IF I had wanted white background, I could have gotten a white canvas. Sometimes, you just gotta paint it all anyway. Let's move on before I get confused!

We are on the home stretch now! Get a ruler and mark in one inch, then continue to put a chalk mark every two inches. You are marking for the tiny screws that you bought.

Start screwing them in by hand, they actually do into canvas fairly easy. I was surprised.

Once it is started good, you can tighten it up with a pair of flat pliers. These can also be used to flatten out those "s" hooks. I have also used these with projects where you are working with chicken wire... handy little tool.

Here ya can see me working along the bottom.

I used a metallic silver sharpe to do the months... and a black one to do all the people and dates. Keeping a bit of privacy and not showing all the names and dates. I like how it turned out. What do you think??? I now understand why the etsy.com folks charge what they do to make these.
I did "celebrate family" because I included anniversary dates. I also used that silver sharpe to go around the outer edge of all the anniversary discs to make them just a bit different from the birthday discs. Hope you enjoyed reading this... be sure to post a picture in comments if you make one. Let me know if you have any questions.
Couple more things... storing the extras... Ever need to add something to a project and you can't remember where you put stuff or what color you used? See below... all the extra supplies in a baggie and it is hanging on the pin behind the canvas on the wall. Ta-da! Now we are finished!

No comments:
Post a Comment